Hi there! In this tutorial we are going to learn how to make a project with swatches that have a different mesh. This could be useful for instance if you wished to create a hat with different animal ears per swatch, or as we are going to see in my example project, a version of an outfit with or without t-shirt.
**Remember! Mods created using the wizard toll are suspected to be the cause of the non-blonde hair bug, so in my tutorials we are always going to start from an empty project. But don’t worry, I will show you how.
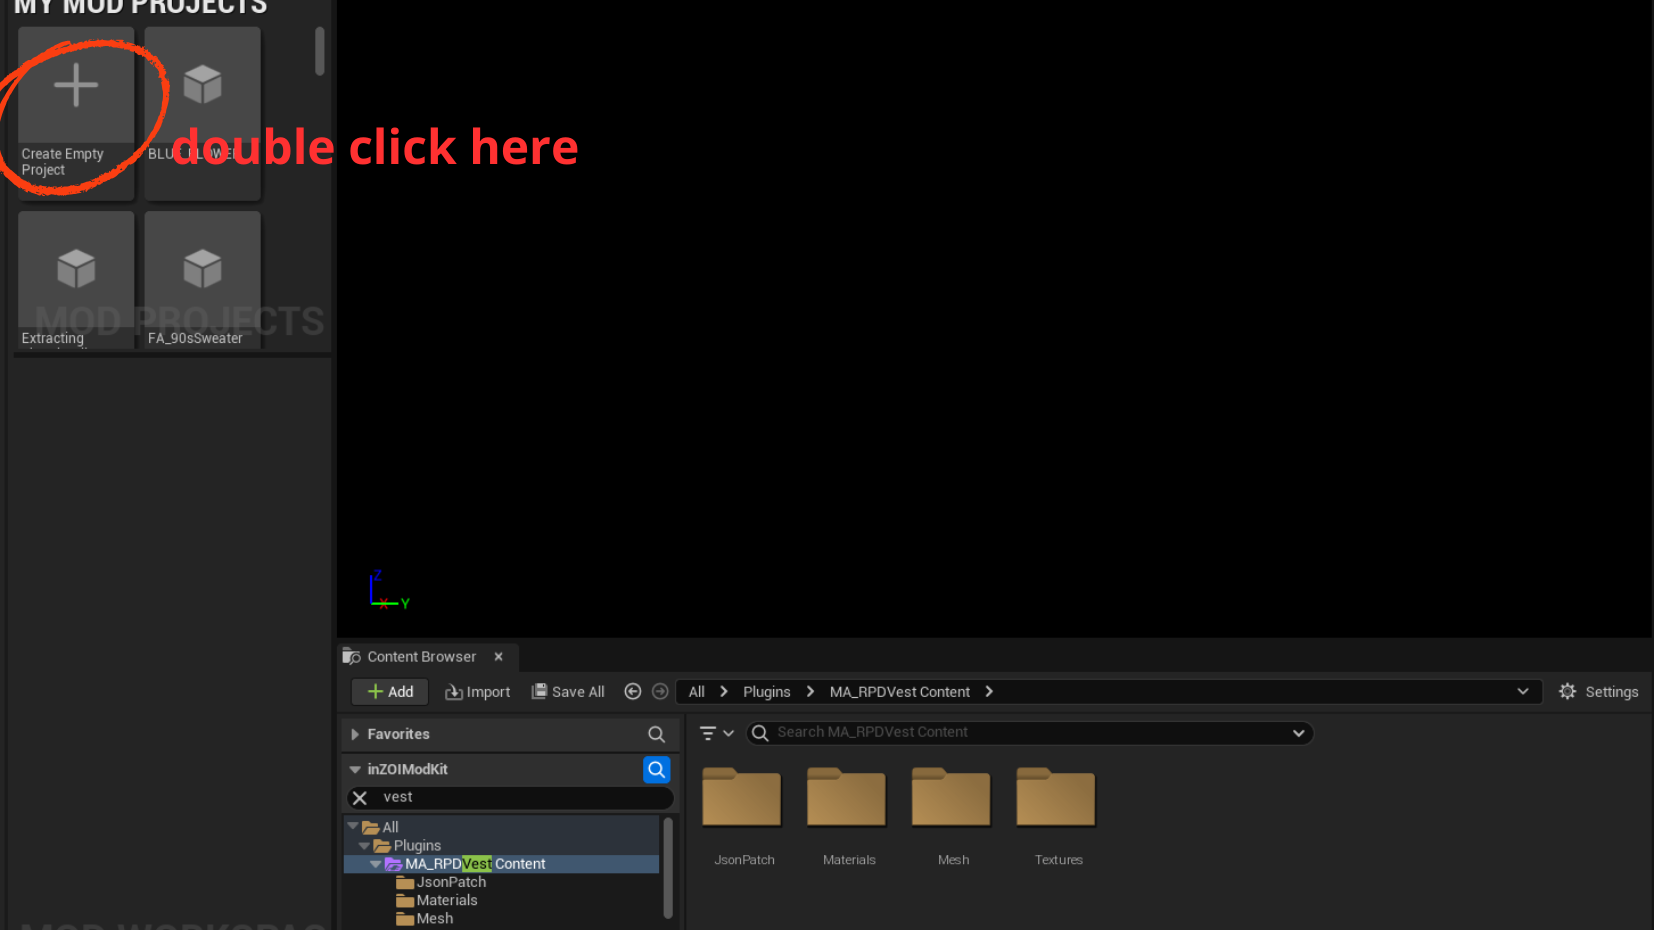
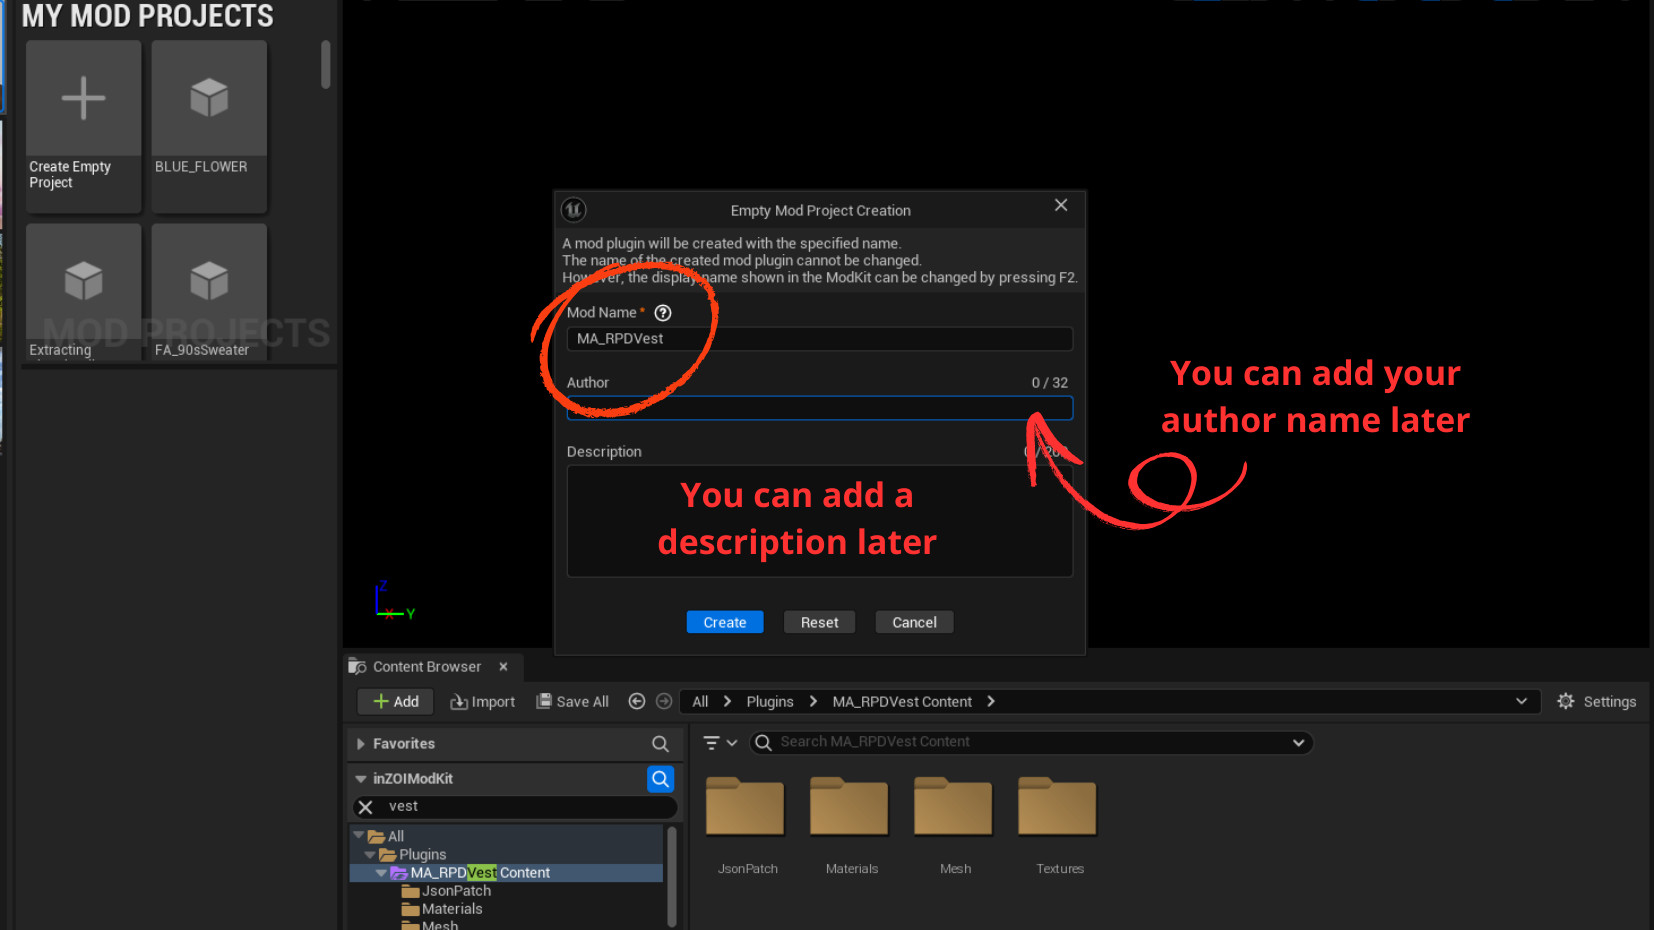
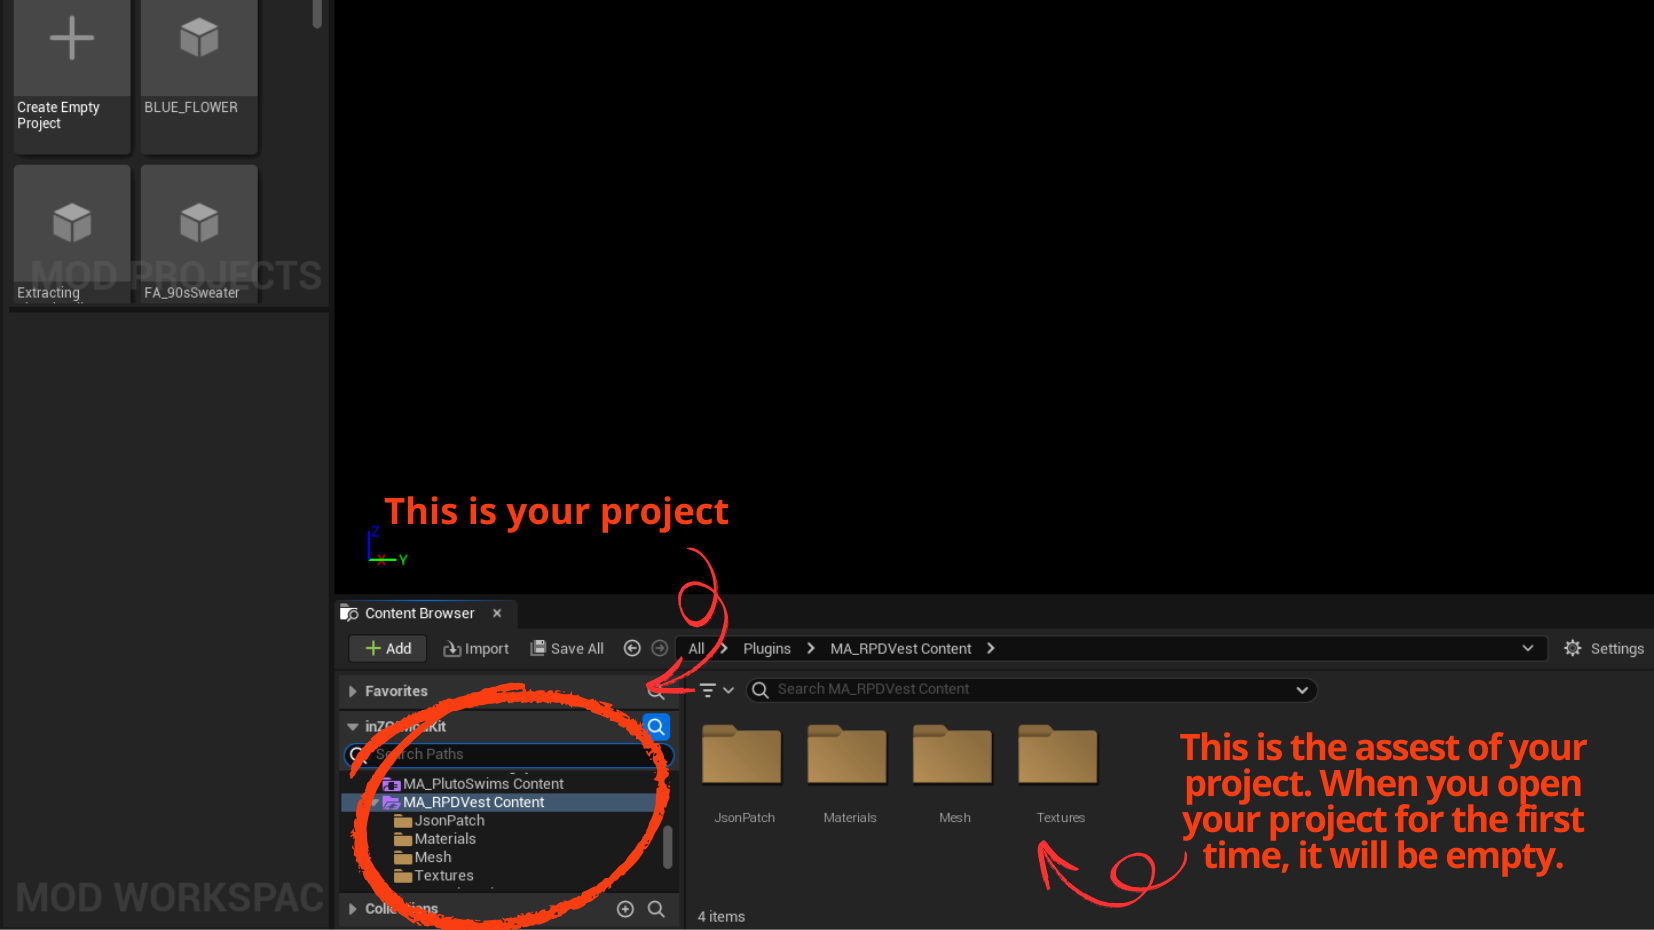
STEP 1 . CREATE EMPTY PROJECT
TUTORIAL 02 (1)
SEPT 02. ADDING YOUR MESHES
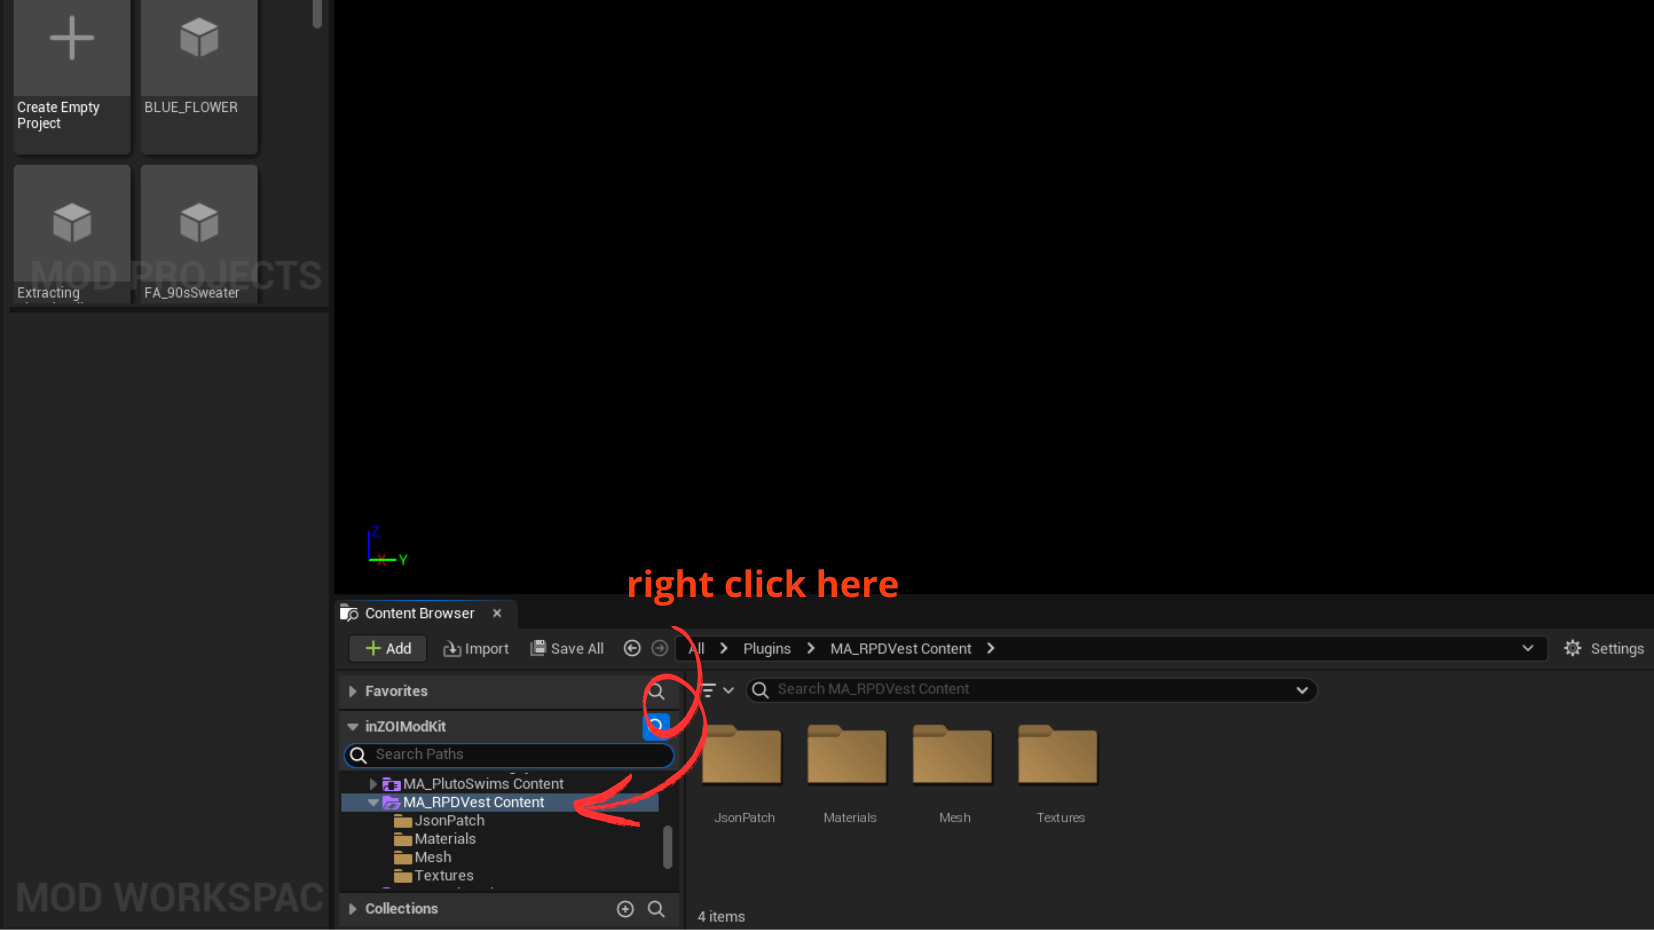
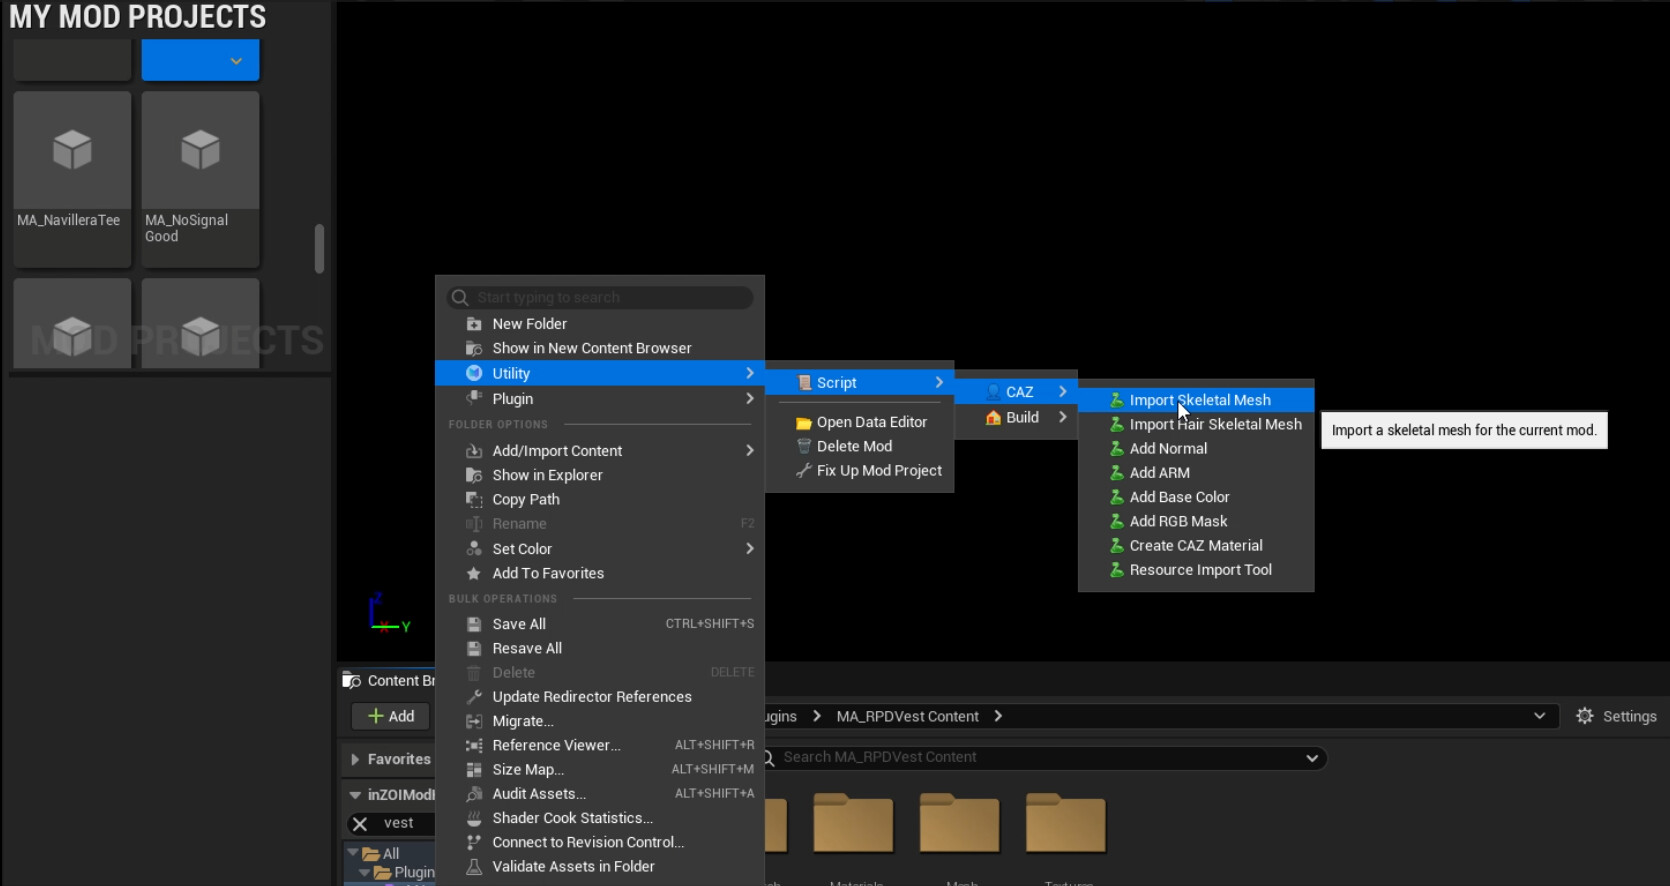
To import your meshes, right click on the name of your project as seen in the images below. Follow the menus: Utility / Script / CAZ / Import Skeletal Mesh.
It will open a window where you can search for your meshes in your computer. Search for them and upload one by one, repeating the process as many times as you need to upload all your meshes (you cannot upload them in bulk).
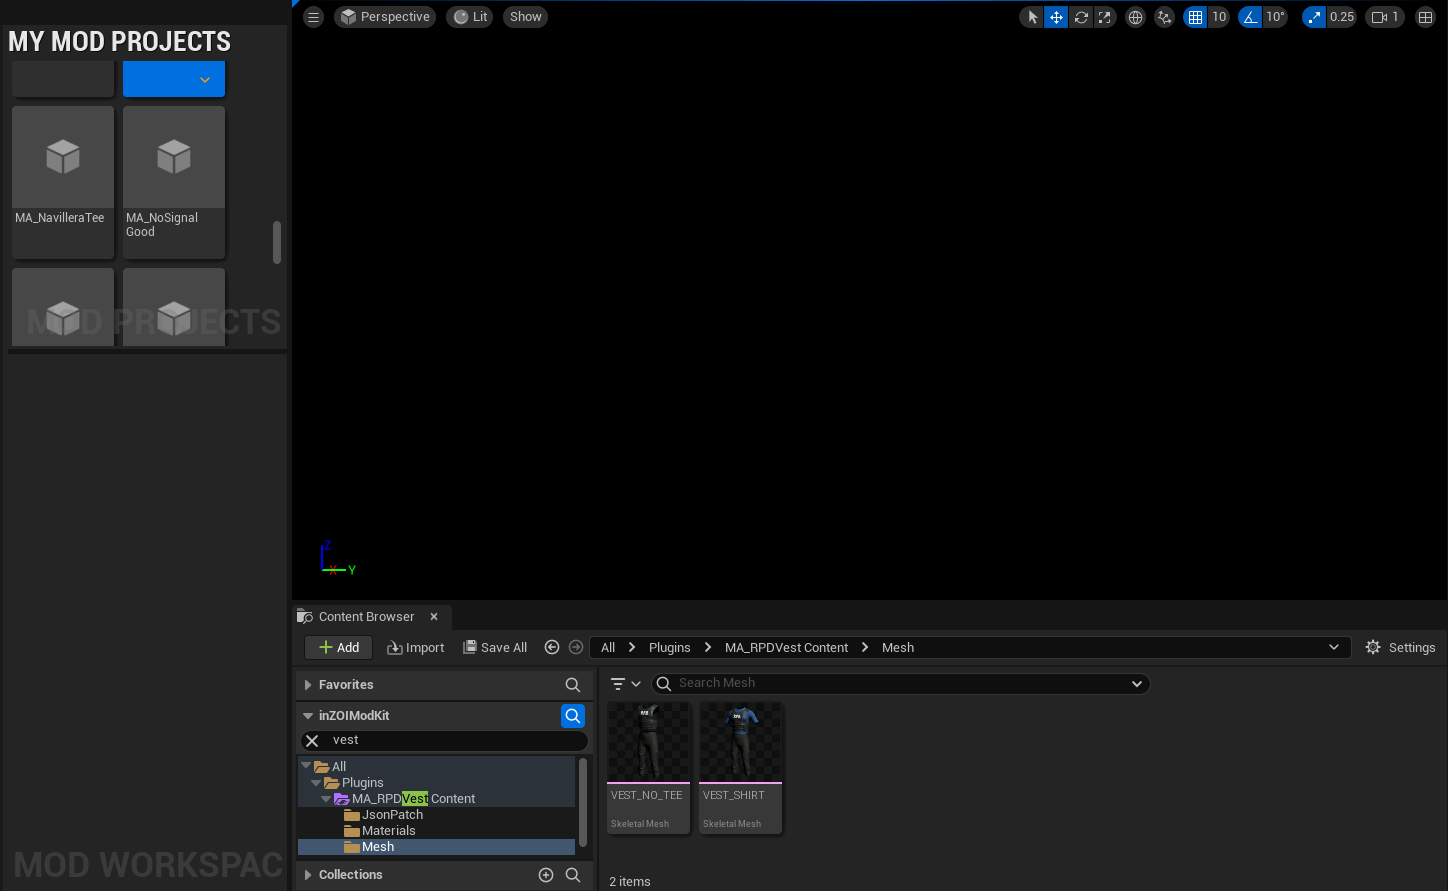
For this project, I have two different swatches, so I will upload two meshes.
After you upload your meshes, a new folder called “Mesh” will appear. Make sure all the meshes you need are there before moving to the next step!
STEP 03. IMPORTING YOUR TEXTURES
For this step, you will import the textures for each of the swatches you will make. Right click on the name of the project again, and follow the Utility menu like this: Utility / Script / CAZ / Import Resource tool.
This will open a big box that allows you to import textures into your project.
To import your diffuse map, click on “base color”, then drag your diffuse map from your computer folder into the are with the big purple arrow.

Once the textures are imported, a folder named “textures” will appear. Make sure all the textures you need are properly imported into that folder before moving to the next step.
**You can import your thumbnails using this tool as well. For a project with swatches, you will need a thumbnail for the whole project, and individual thumbnails for each of the swatches.
STEP 04. CREATING YOUR MATERIALS
You are going to need one material per swatch. To create a material, follow the menu: Utility / Script / CAZ / Create material. It will prompt a small window asking you to name the material.
TIP: Name it something that you will recognize! You are going to have to find it later by its name from a very very long list of UE5 assest, so giving it recognizable and searchable mame is important.

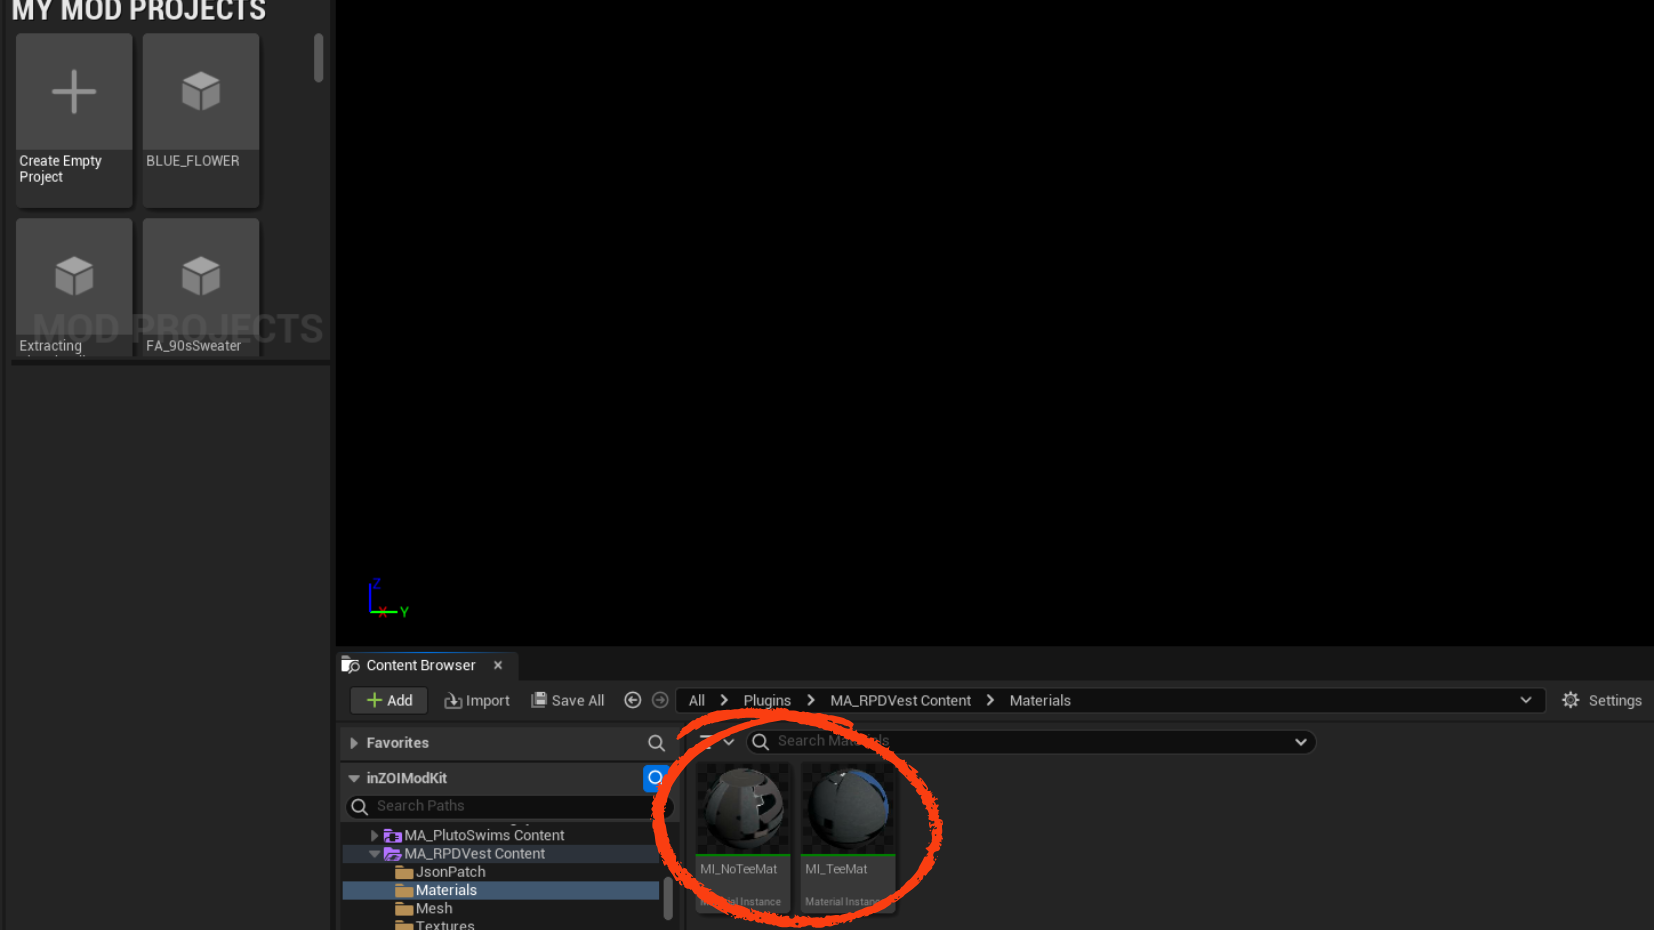
Once you create your fist materials, a folder named “materials” will be created. Make sure you have created all the materials you need before proceding with the next step! (Remember, one material per swatch"!).
STEP 05. SETTING YOUR DATA IN THE DATA EDITOR
In order to know how to open and set up the data editor, please go to my previous tutorial on swatches. Don’t worry, it’s easy :). In here, I will tell you what you need to do differently so that your swatches have different meshes and the different meshes show up in game.
GARMENT_____MESH FILES:

For Garment___Mesh, you are going to need a main file and then one file per swatch that you want to add. It will end up looking like below:
- Main file: M_VestTee
- Group ID: M_RPDVest
- Individual ID: M_RPDVest
- Swatch 1 M_VestTee00
- Group ID: M_RPDVest
- Individual ID: VestTee00
- Swatch 2 M_VestTee01
- Group ID: M_RPDVest
- Individual ID: VestTee01
As I teached you in my previous tutorial, the main file and the 1st swatch are exactly the same (same mesh, same texture override) except that the 2st swatch’s individual ID changes. The group ID, however, remains the same as well.
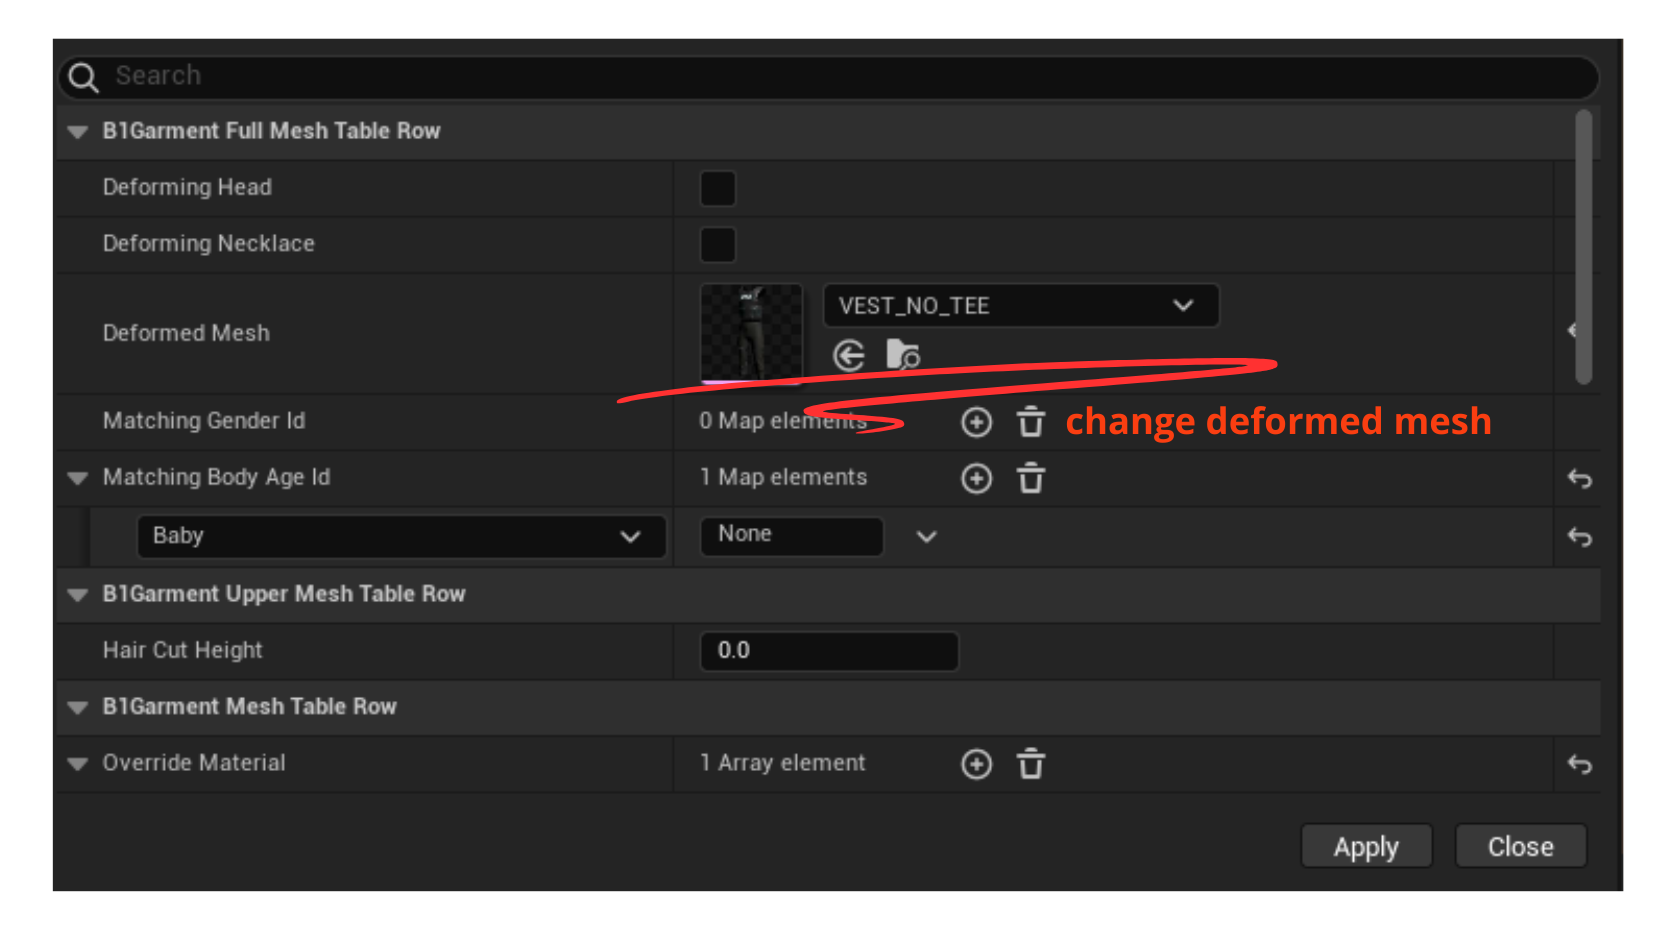
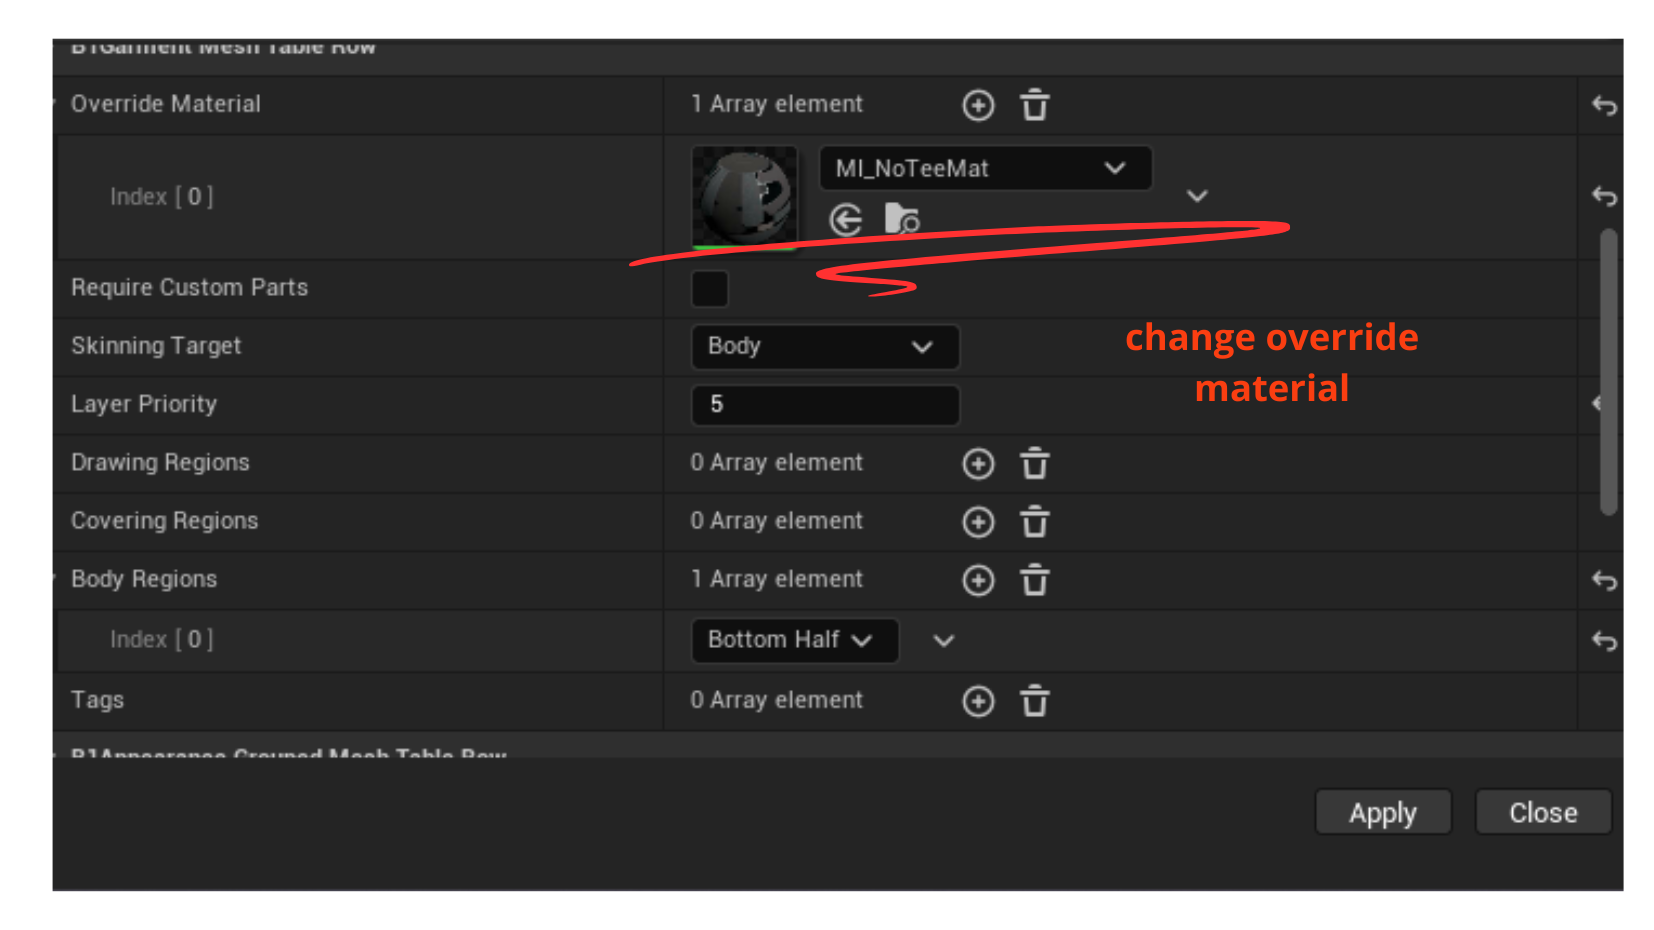
Inside each file, you need to change the following: mesh, deformed mesh (if there is one needed), material override and the B1 Appearance Table Row ID.

GARMENT_____ FILE:
You only need one file in your Garment____. In this file, simply add as many variants as you need, listed by the individual IDs and then put in your thumbnail. If you need any more detailed information you can check my previous tutorial on swatches.


Once you are finished setting everything up like we’ve done above, close the data editor, export your mod and check it in-game to make sure everything went well.
If you need help or encounter any issues while following this tutorial, please let me know.
I will be more than happy to help ![]()
Happy zoiventures!