
In this tutorial, I will teach you two ways of creating the illusion of transparency for your garments.
-
For when the whole garment must be transparent to a degree
-
For when a garment has both normal fabric and transparencies
-
TRANSPARENCY FOR THE WHOLE GARMENT
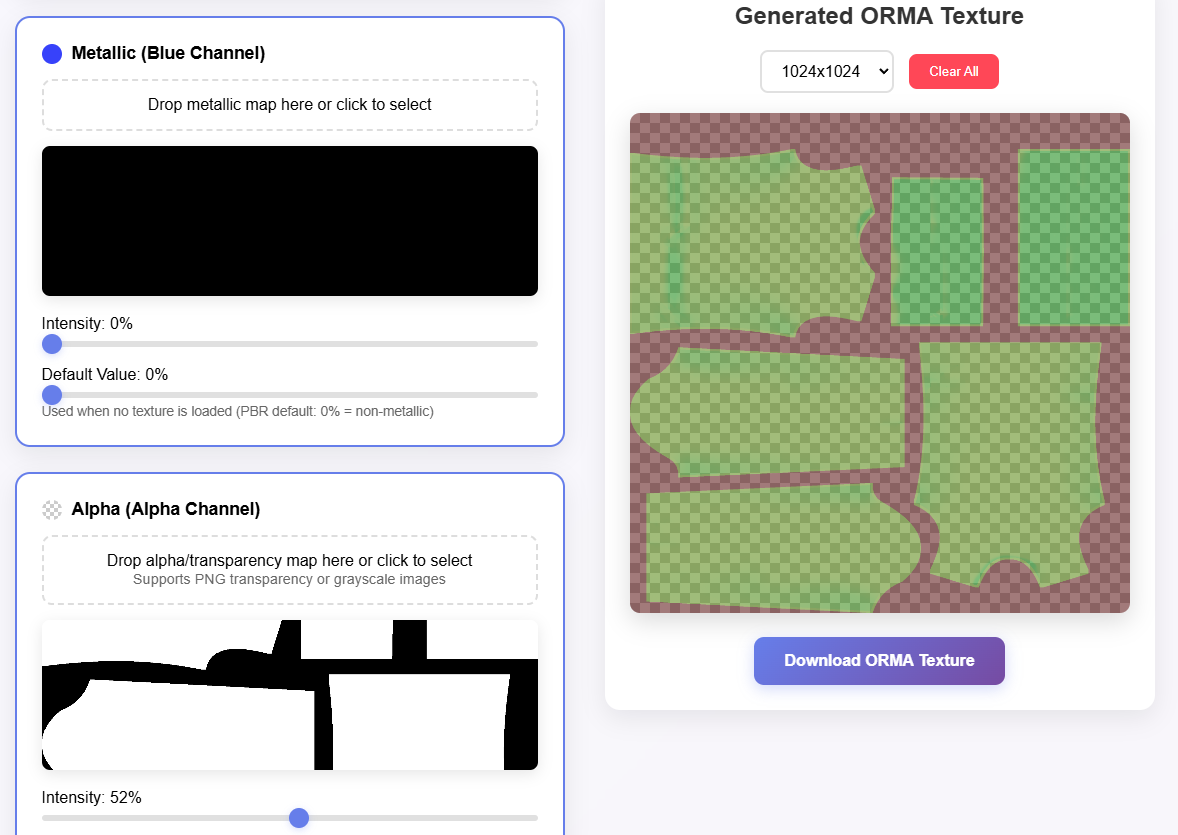
When creating your ARM Map (as taught in this tutorial), tweak the opacity of the Alpha Channel as lower as transparent you want your garment to be. The lower the intensity, the higher the transparency. With this, once you add your ARM map in the “AO, Roughness, Metalness” slot inside your project, you will see how it becomes transparent.
This is what you will need to complete this tutorial:

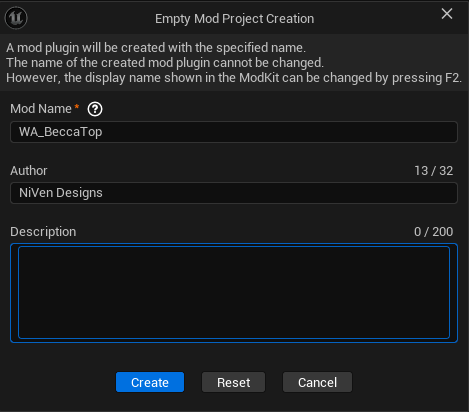
As indicated in this tutorial, first we create our project. In my case its WA_BeccaTop in honor to a dear person of mine.
Import your skeletal mesh and your textures as you would do with a “normal” project (Thumbnail, Diffuse Map, AO Map, Normal Map). Your Textures folder should look like this:

Material: For the Material, we are going to create as many materials as transparencies needed.
If you have different parts with different dregrees of transparency, you will create one material for each transparency needed, but if all the transparencies are the same degree or see through, you will only need one for all of them.
Your material folder should look like this:

**Tip: I name them like this so I can find them more quickly inside data editor:
[ModName] + Mat + Specifications
For example:
BeccaMat
BeccaMatTransp
BeccaMattInvisible
And so on.
Back to bussiness, now we associate our textures to the material “balls” as we would do normally, which means both of them will have the same diffuse, AO and Normal Maps. Remember to save after each step.
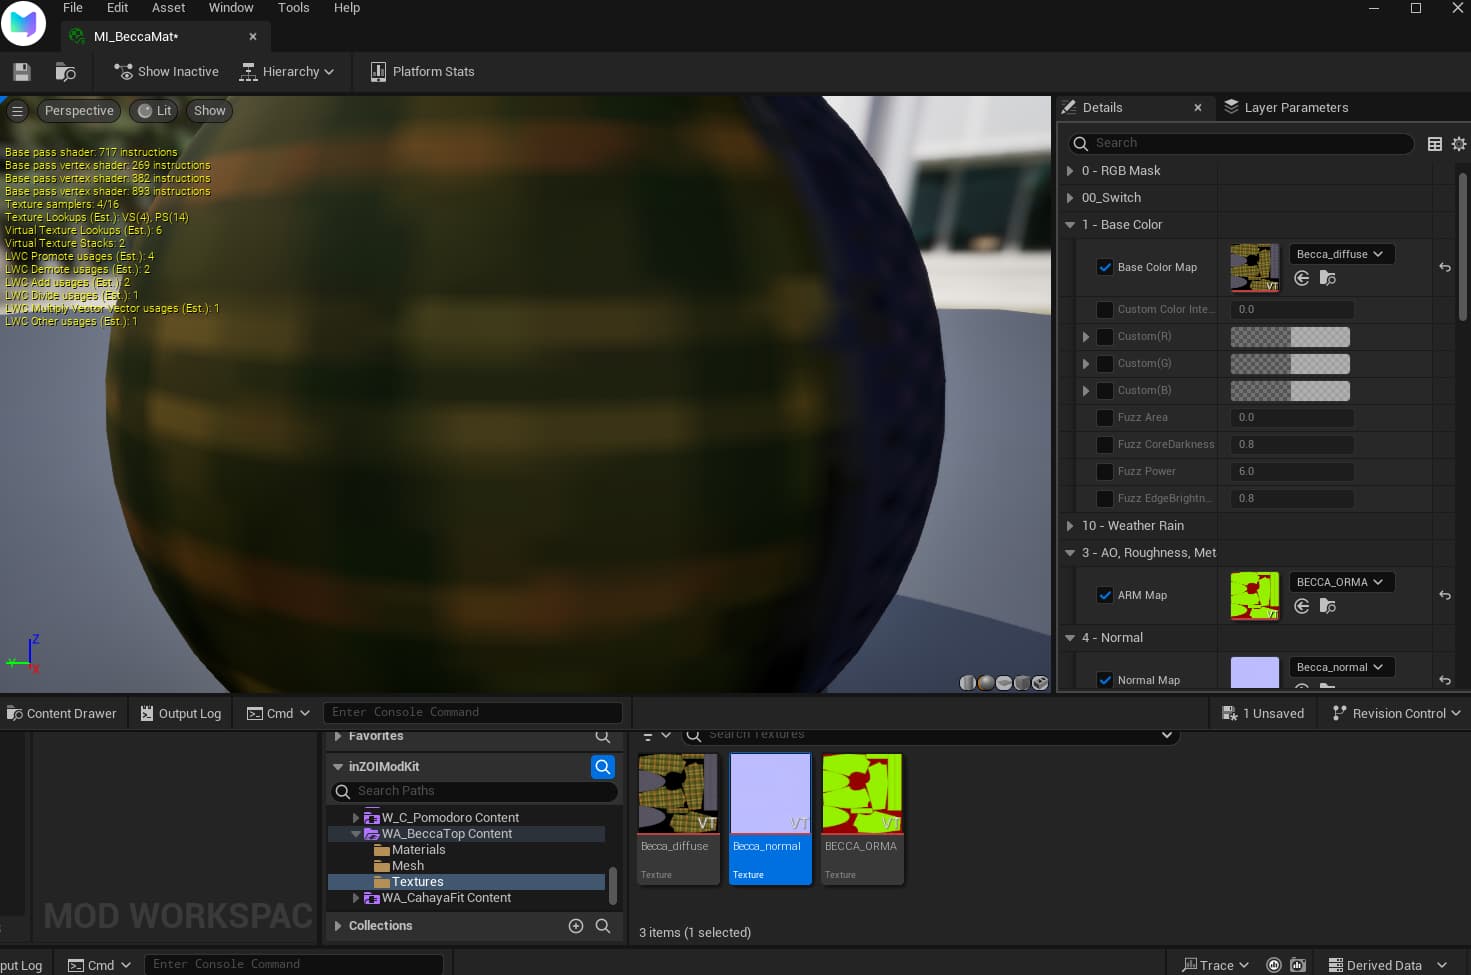
Once you are done, lets make transparent the material we’ve chosen for it. Double click, associate the textures and now on the search bar we type “opacity”, click it to make it active and change the number. Dont worry if the modkit lags a bit here, just save after the transparency has been applied to this material (I explain how to choose the numbers bellow the pictures)


- Write a value around 0.66666 or 0.77777 if you want it to be translucent but visible.
- Write “1” if you want it to be completely invisible.
Here are two examples of how both 0.7 and 1 will look in your garment. IMPORTANT: You need to type at least 4 decimals for it to work nicely.
EXAMPLE 1: OPACITY VALUE “0.7777”:
EXAMPLE 2: OPACITY VALUE ”1”:

2.2 HOW TO IDENTIFY WHERE TO ADD THE TRANSPARENT MATERIAL IN YOUR MESH
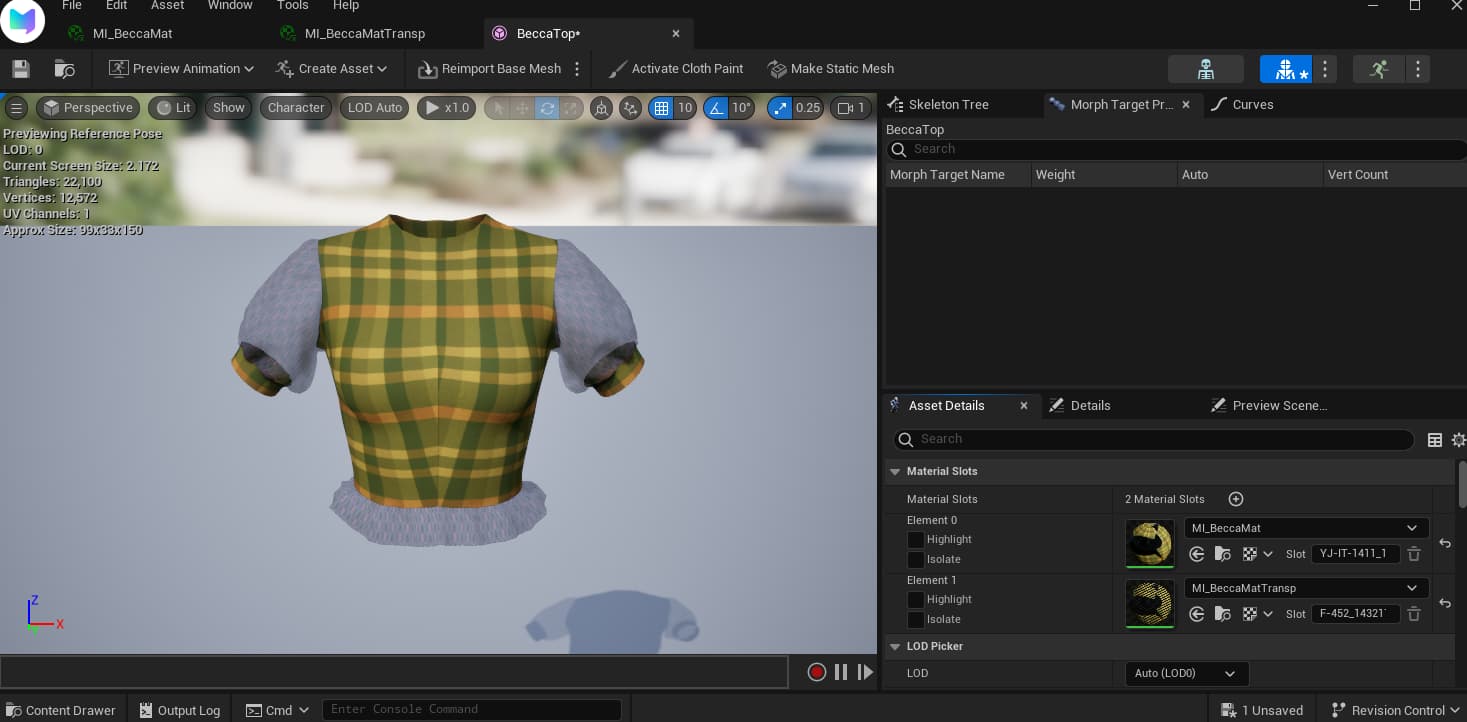
Double click your mesh in order to open it as you would normally do to add the material to your mesh. In the “Material Slots” you will see two options for each of them:
- Highlight: An orange outline will appear, indicating what areas are affected by this material
- Isolate: Everything except for the area affected by this material will disappear.
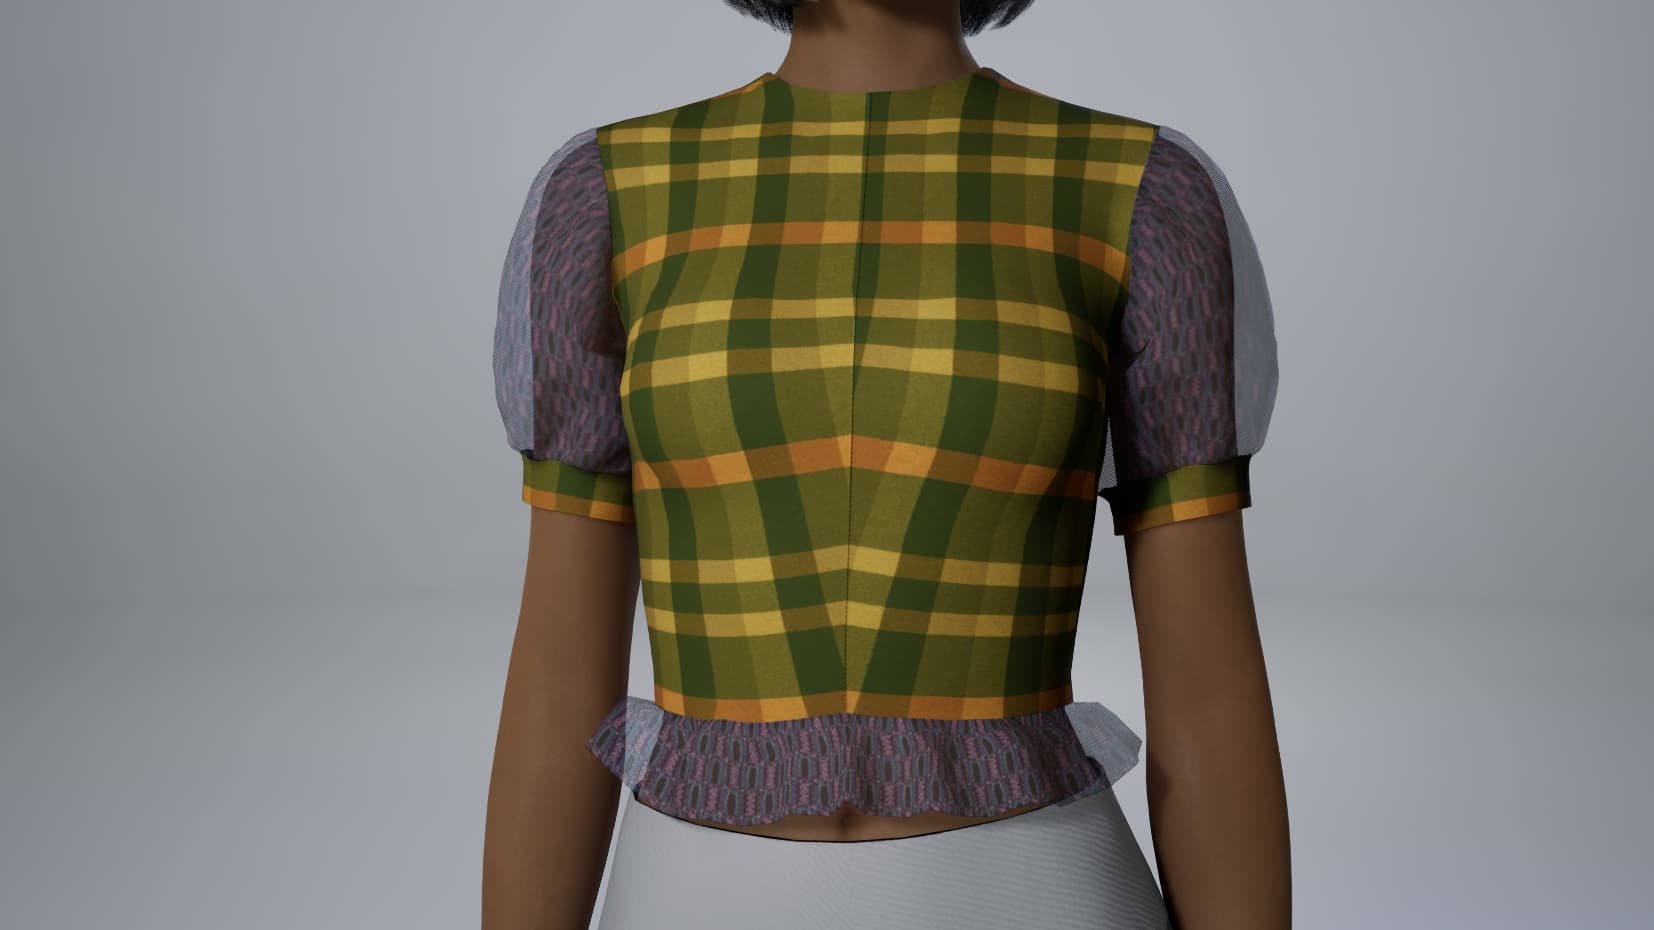
Click “Isolate” to check where you should drag your transparent material too, in my case that would be the Sleeves and the frill, affected by the SECOND slot, see:
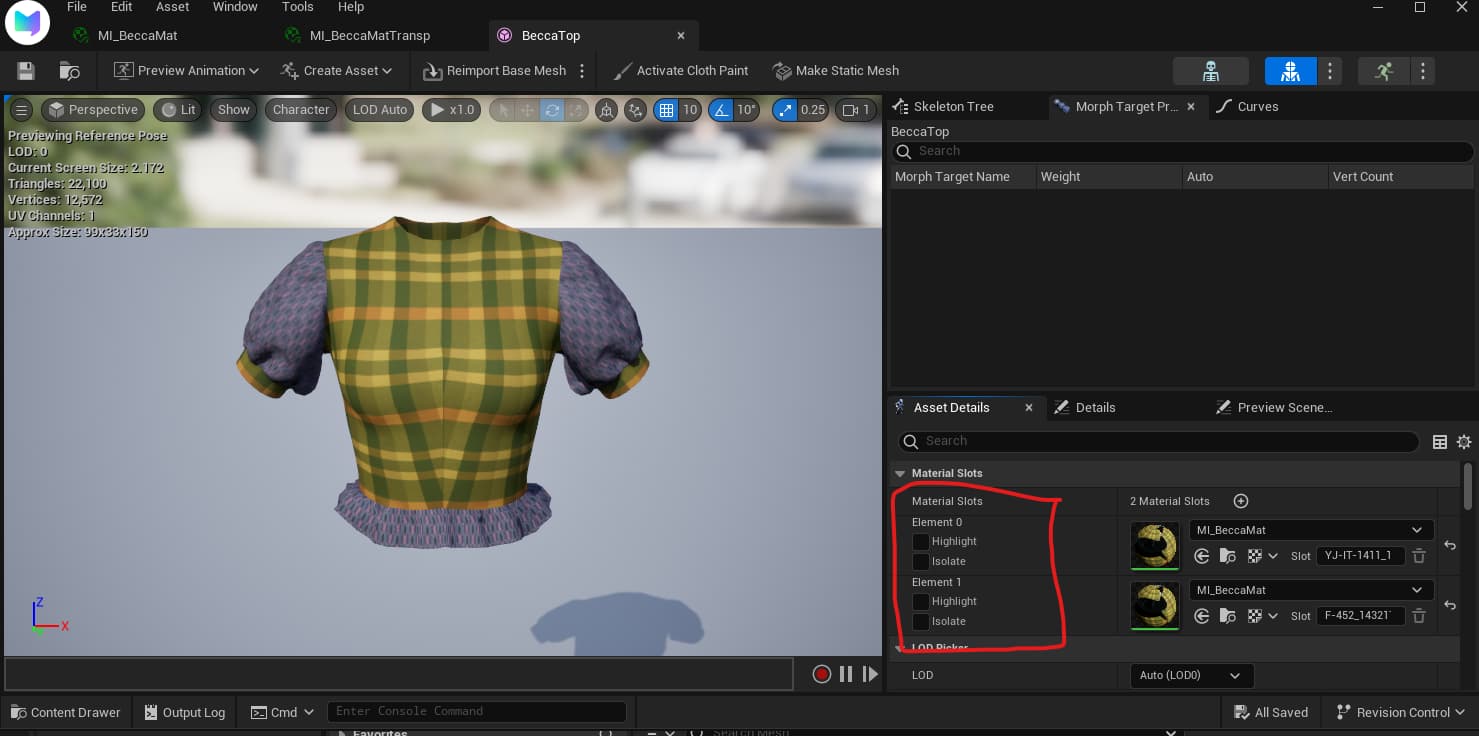
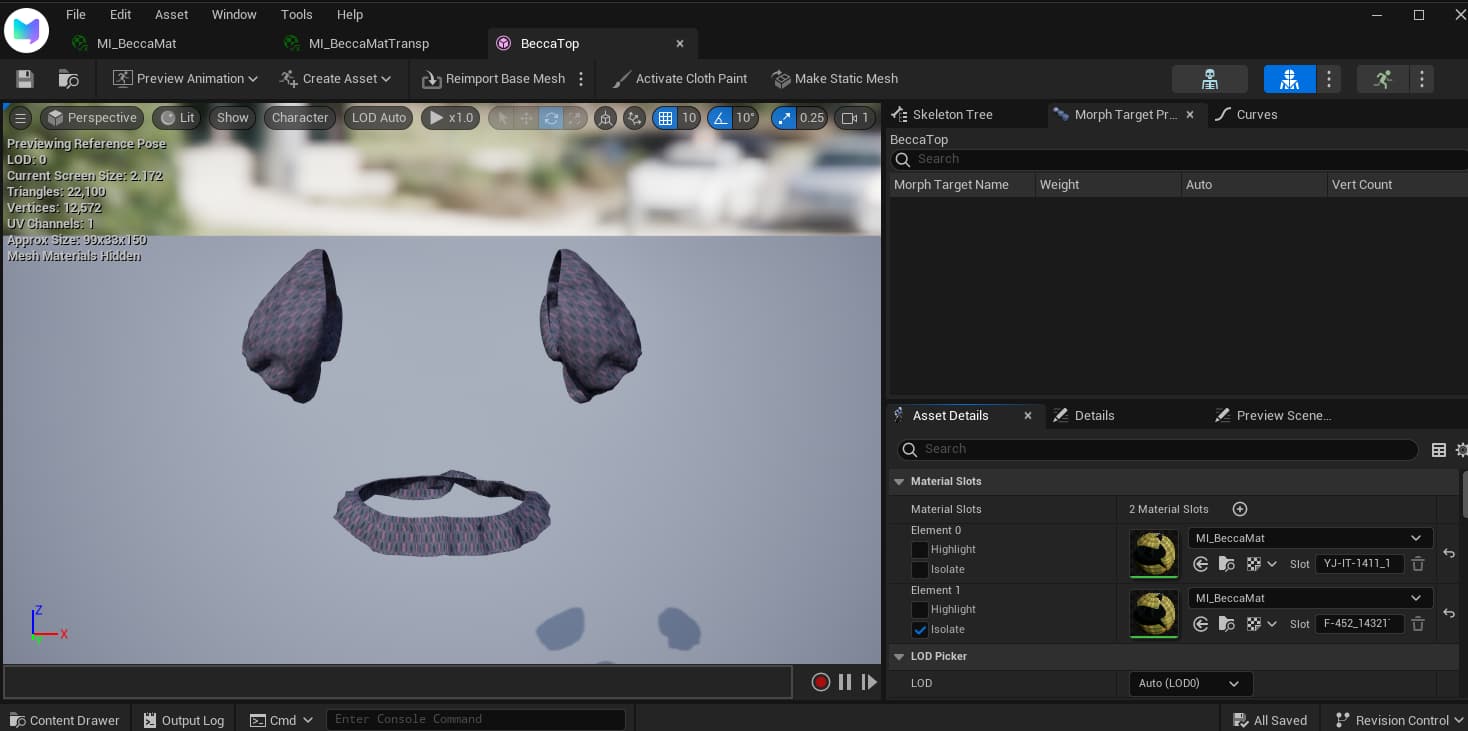
(If you have more than one transparency, repeat these steps as many times as it might be necessary)
Once you’ve identified where you need to put your transparencies, untick “isolate” and drag your transparency material ball to the corresponding slot. Save and close this window.
[Don’t despare, we are so close now! ʕ ● ᴥ ●ʔ]![]()
2.3 DATA EDITOR: HOW TO MAKE IT SHOW UP IN GAME
We go into data editor and set everything we need up (follow this tutorial if you are not familiar with this part)
First, lets set “GarmentTopMesh” up by right clicking on our selected garment - “Append New Item”. We will repeat this step as many times as swatches needed. If you do not know how to create swatches from scratch, you can follow this tutorial.
Follow the steps so your item will look like the photos bellow, I will write them here so you can check one by one:
- Deforming Bottom: Blank
- Deforming Head: Blank
- Deforming Necklace: Blank
- Deformed Mesh: Search for your mesh
- Matching Gender ID: If your garment is unisex, you will put here the name of the garment for the other gender (for example: M_BeccaTop). If not, delete.
- Matching Body Age ID: Delete “Youth”.

B1Garment Mesh Table Row:
- Override Material: Here we add our base non transparent material into the available slot, then click “+” and add as many slots as types of transparencies you need, in my case that would be 1. Add your transparent material to this new slot
![]() IMPORTANT: “Require Custom Parts” must be clicked (“true”) for both materials to show properly ingame.
IMPORTANT: “Require Custom Parts” must be clicked (“true”) for both materials to show properly ingame.
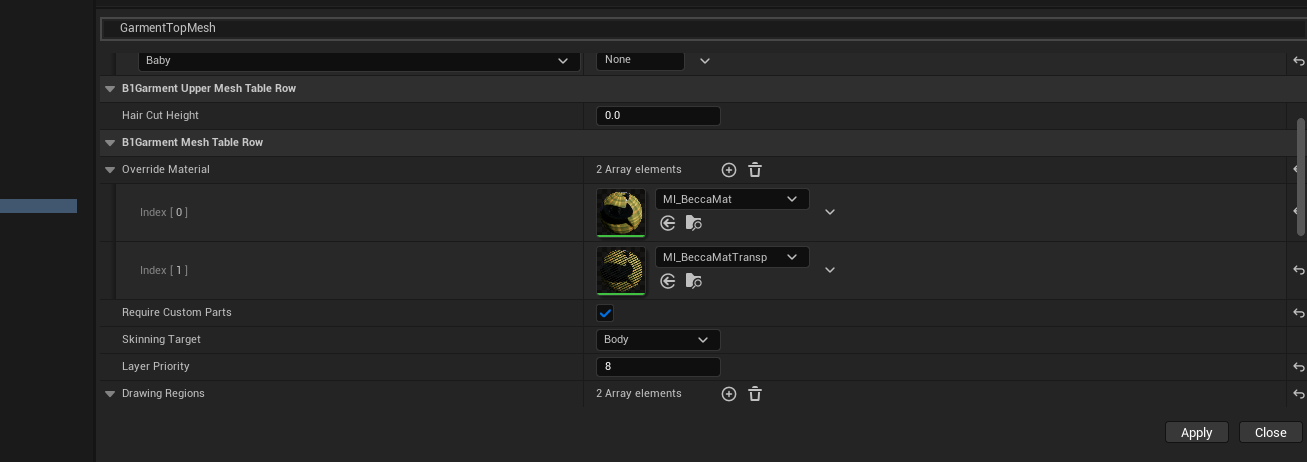
- SkinningTarget: Body (because we are creating clothing that goes on the body)
- Layer Priority: 8
We add the Drawing, Covering and Body regions needed for our garment (I am working in a tutorial to make this step easier, as choosing these areas properly is currently a headache for me…!)
B1Appearance Grouped Mesh Table Row:
- Group ID: The name of our project, in my case that would be “W_BeccaTop”
- B1Appearance Mesh Table Row: We choose our mesh again
- ID: The same name you put on Group ID.
- Gender Type: Female/Male
- Sub Categories: Adult/Youth
- Thumbnail: Your thumbnail or, in case you do not have it, a placeholder.
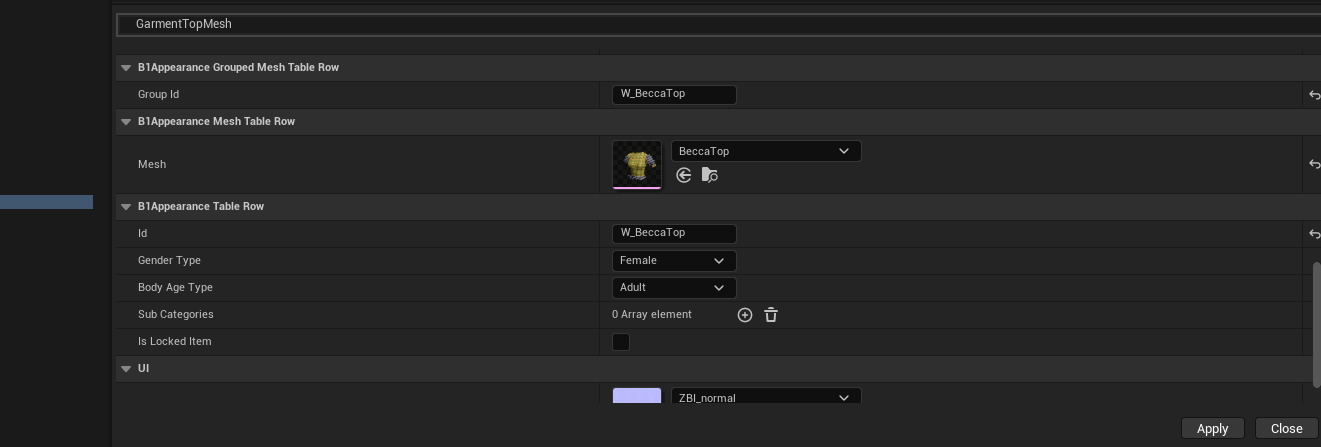
Click “Apply” at the bottom, then “Save” at the top right.
Now we create our GarmentTop just as we would do for a normal piece with no transparencies (tutorial here), we save and we proceed to close this window and “export local mod package” so you can check the garment inside your game.
NOTE: If your garment has more than 1 swatch and transparencies, you would add the override material slots for each swatch, and click “Require Custom Parts” for each swatch, as well.
Tada! We are done! ᵔᴥᵔ
This is how my garment looks ingame:
Hope this was of any help,
Happy Zoidventures~
![]()
![]()
![]()