Intermediate Modding Tutorial I: Creating Necklaces inside the Modkit

To make a necklace we are going to need to set up an empty project as we would normally do: create project, give it a name and load inside the modkit all our meshes, textures and materials. Please refer to my previous tutorial on how to make an empty project if you don’t know how to do this yet, then come back here for the specific directions on how to put your necklace in game.
(!) I will soon be uploading a video so that you can follow the step by step guide on how to put a necklace in the modkit from scratch.
- PROJECT SET UP
After setting up everything this is how your project should look like:
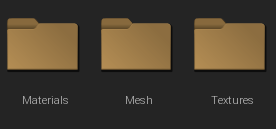
If your pendant has swatches, you should have one mesh per swatch. You don’t need to create more meshes, just load one mesh into the modkit, then copy and paste (Ctrl + C, Ctrl + V) to create as many copies as you want. The modkit will automatically rename your meshes “mesh1”, “mesh2”, etc.
In my case, I have 3 swatches, so this is how my “Mesh” folder looks like:

- DATA EDITOR
Once you have everything that you need, please head to the data editor for your project. Here, you will have to choose “Skinned Accesory Mesh” and “Skinned Accesory” as the data assets to work with. See picture bellow for reference.

2.1. “SKINNEDACCESSORYMESH” DATA ASSET
Double click on “SkinnedAccesoryMesh”.
On the list that will unfold, search for anything that is W_Necklace or M_Necklace, like the ones you see in the picture bellow, and choose whatever you need based on the target gender.
W_Necklace will create a necklace for women, while M_Necklace will create one for men.

Once you have chosen, right click and select “append new item”. The menu bellow will appear. Follow the steps in the images to set everything as it should be:
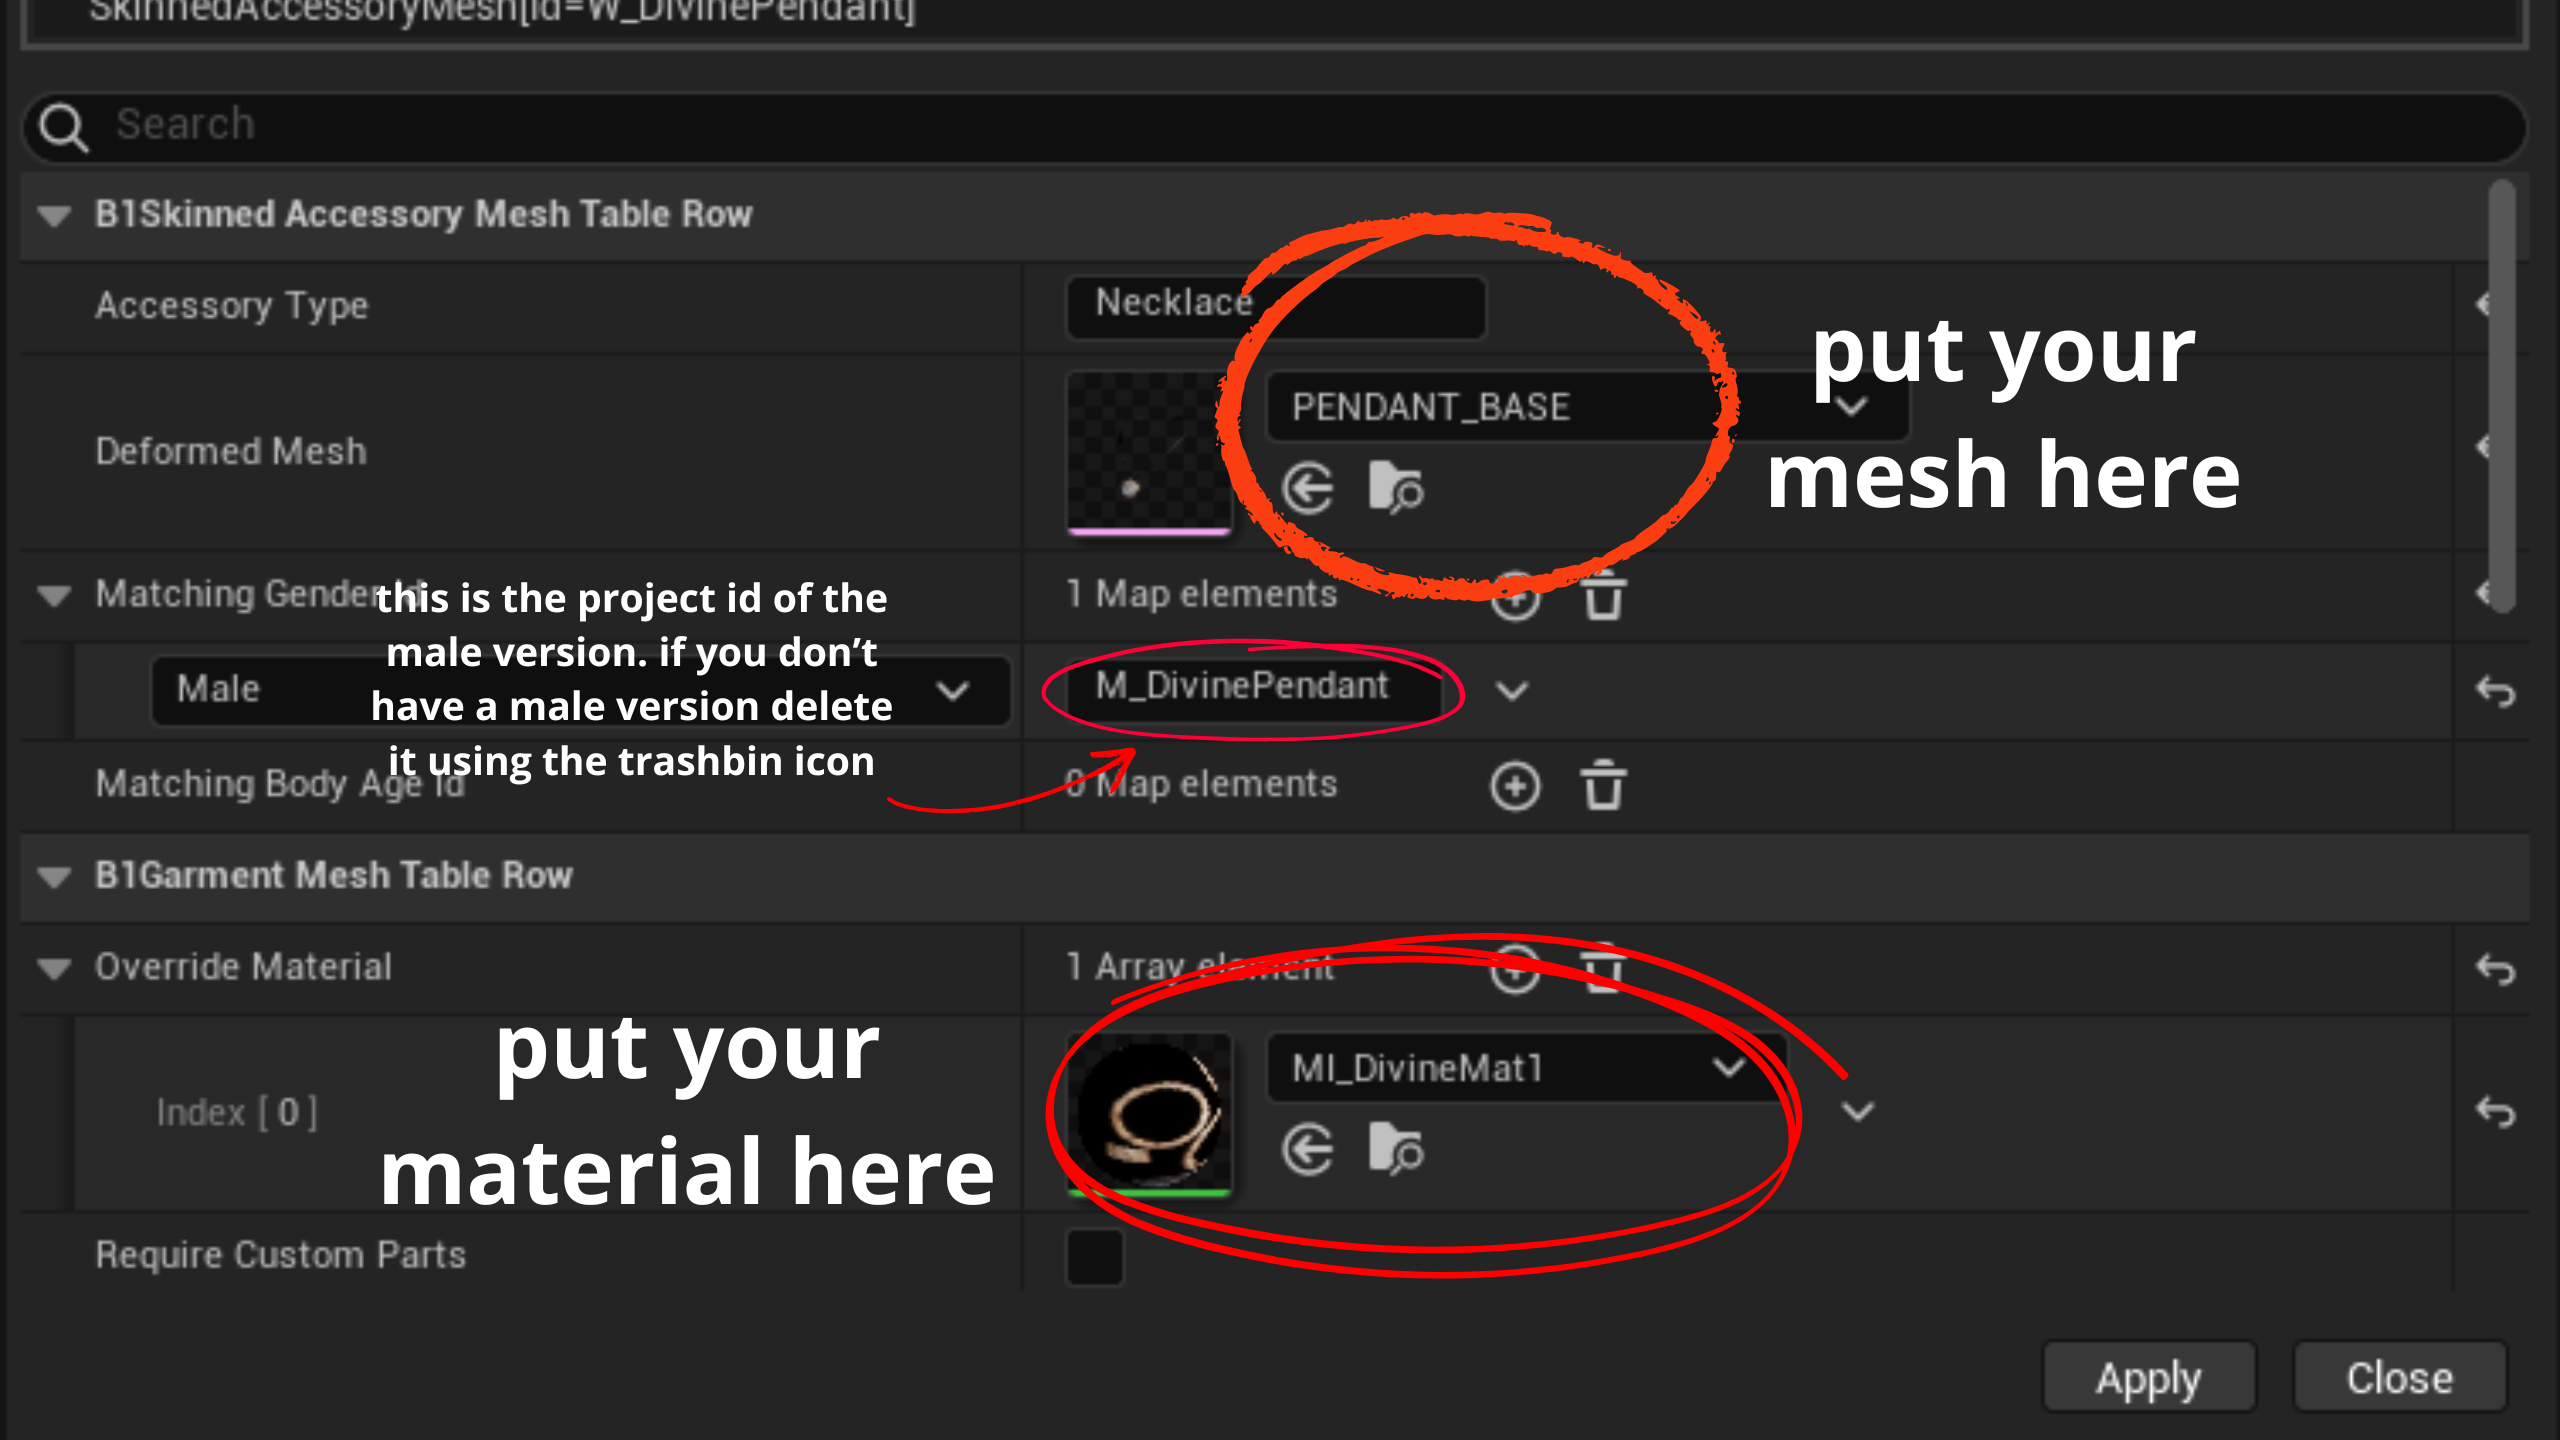
For the next step, it is VERY IMPORTANT that you set your “Skinning target” to “HEAD”. This means the cc piece you are putting into the game will be taking its weight information from the neck and head, instead of the body.
There are no body regions for the neck, so I didn’t include any. Necklaces typically don’t cover much so it’s best this way.

2.2. “SKINNEDACCESORY” DATA ASSET
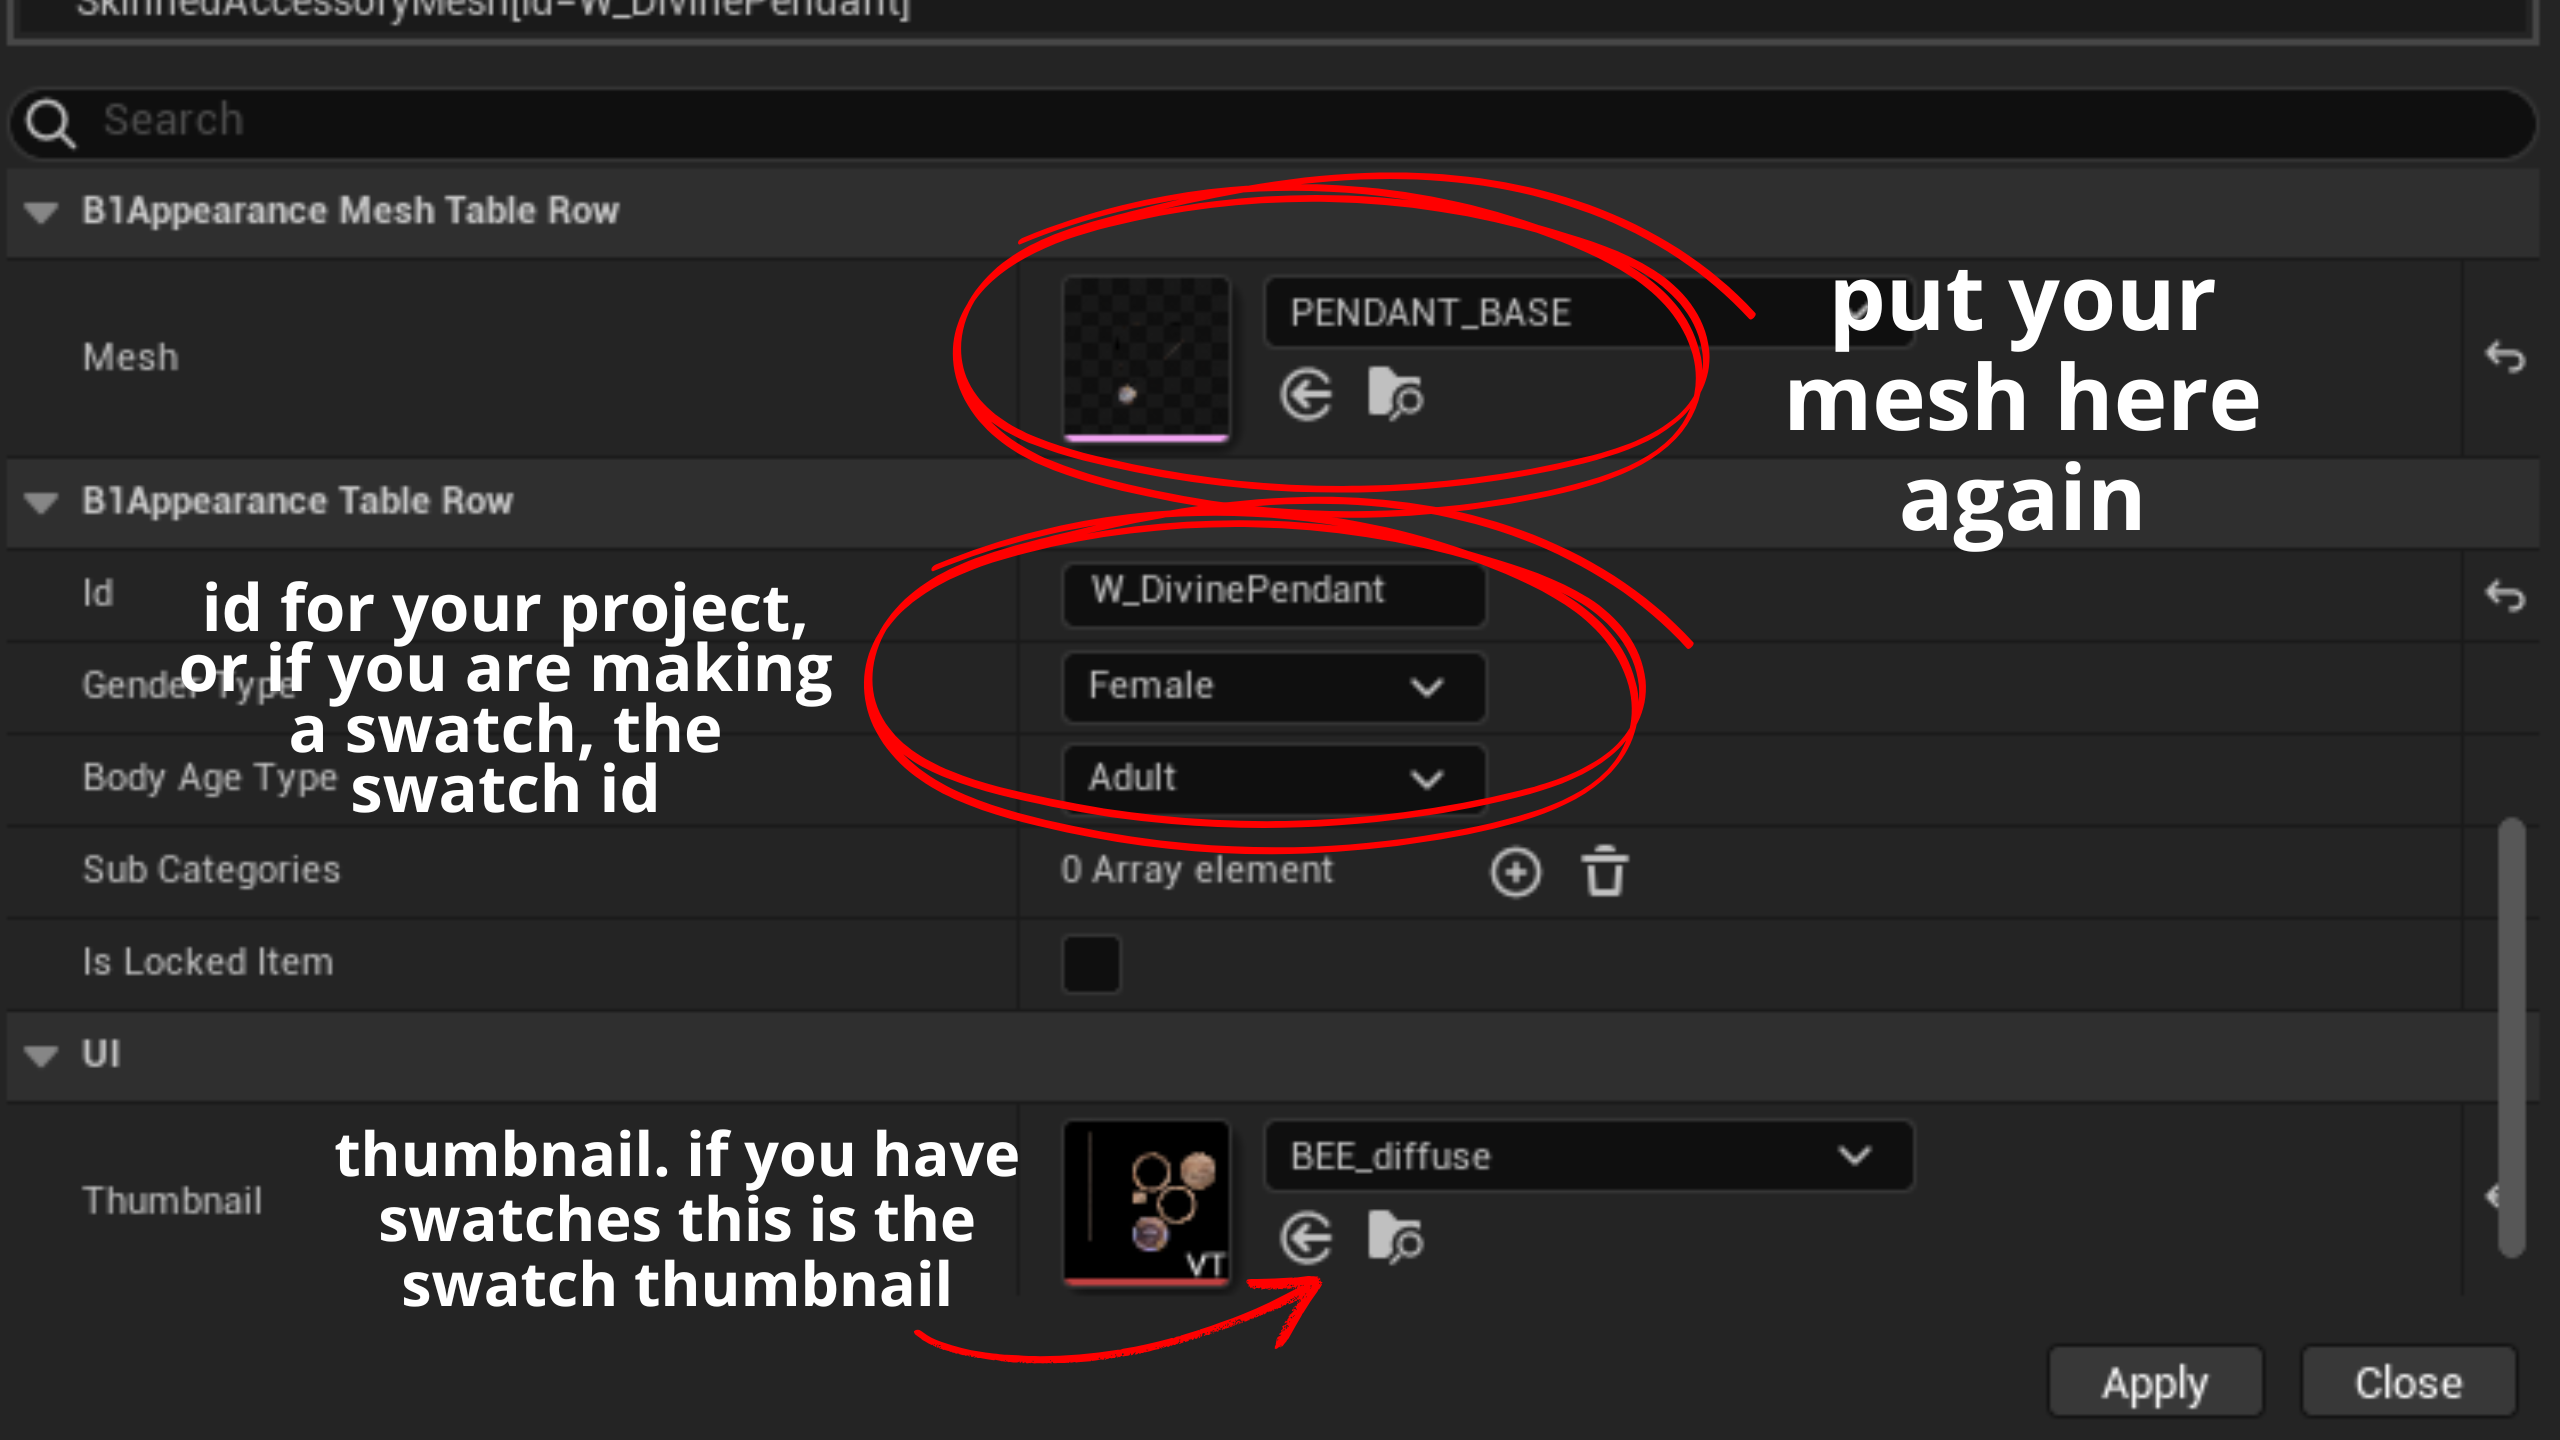
Double click on “SkinnedAccesory”.
On the list that will unfold, search for anything that is W_Necklace or M_Necklace, like the ones you see in the picture bellow, and choose whatever you need based on the target gender.
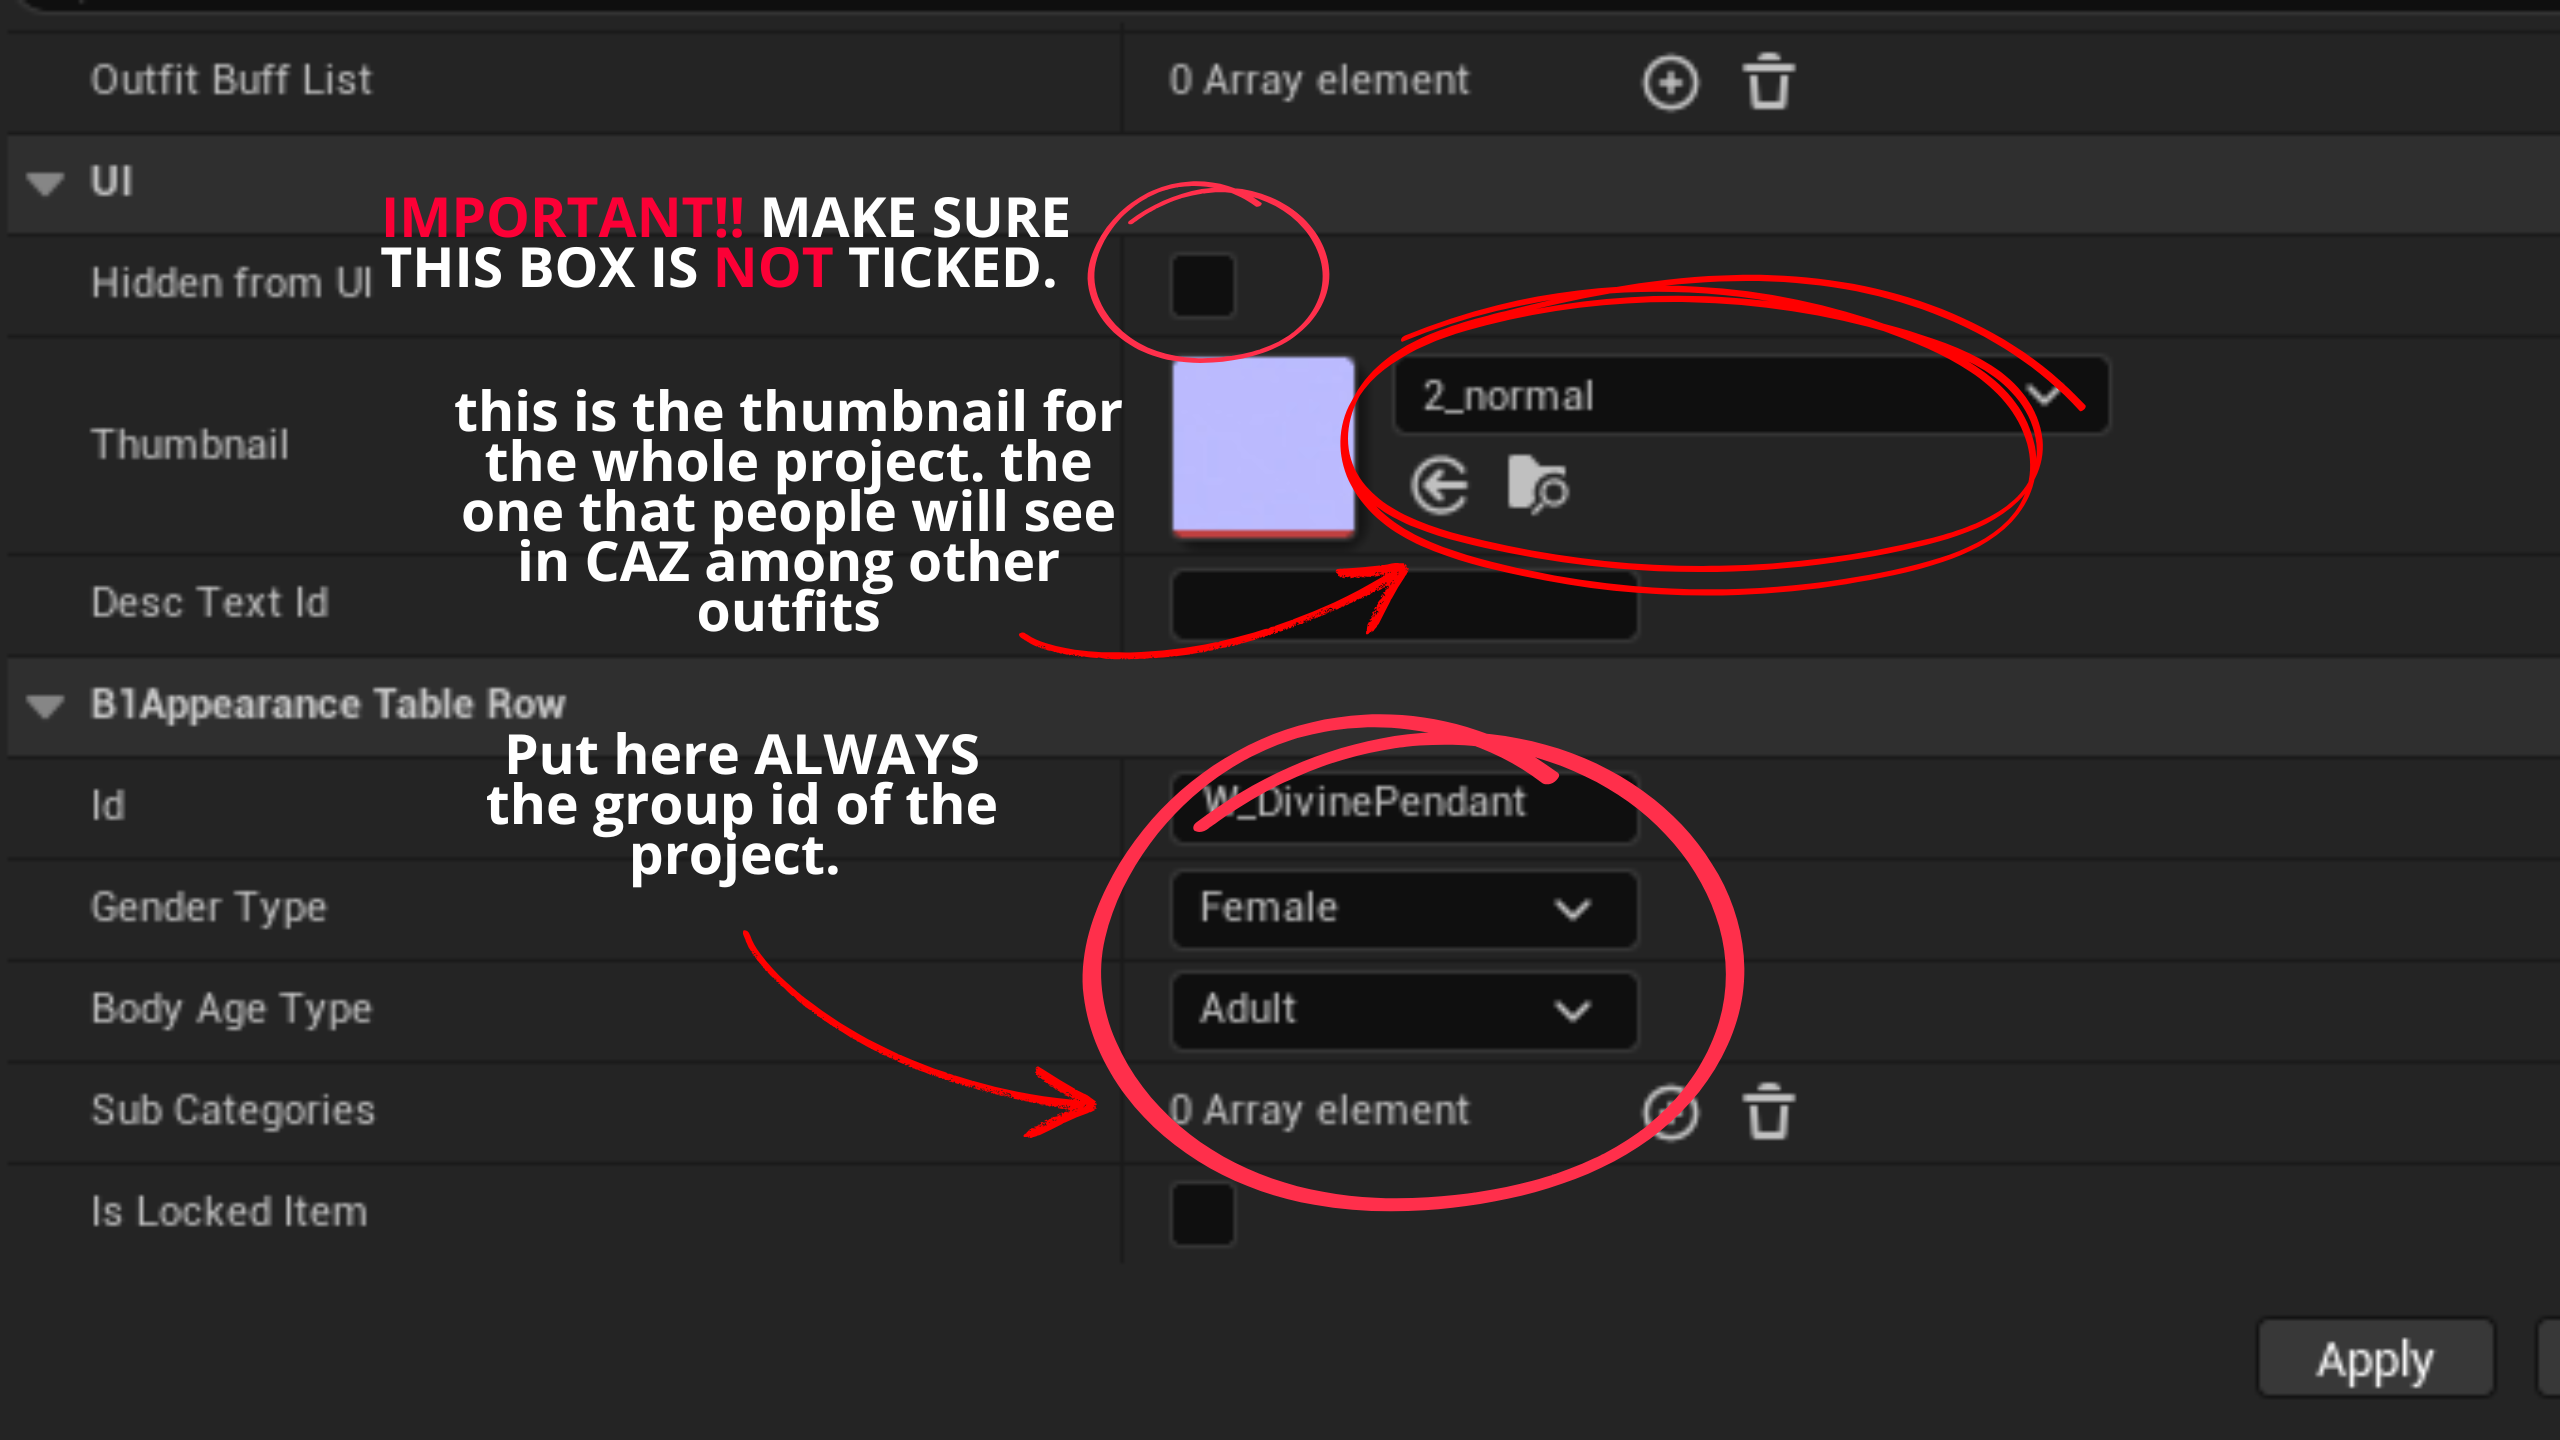
Once you have chosen, right click and select “append new item”. The menu bellow will appear. Follow the steps in the images to set everything as it should be:

IMPORTANT!! There is “Hidden from UI” box that usually comes ticked for necklaces, since some of them are only unlockable in-game by crafting them. Please UNTICK this if you find it ticked, or leave it unticked if not. When it is ticked, your necklace will be in-game, but it won’t appear in CAZ, so zois won’t be able to put it on.
3. EXPORT
Click on your project in the left menu, choose “Create local mod package”. When the modkit tellS you that it was succesfully exported, check in game to see how it looks!
Hope you find this small tutorial useful.
Happy zoiventures! ![]()